De ultieme gids voor Mailchimp
Zo gebruik je Mailchimp
Ah ja, MailKimp.
Of is het KaleLimp?
...MailShrimp? 🤔

Hoe je hun naam ook uitspreekt, het in Atlanta gevestigde marketingautomatiserings- en e-mailmarketingplatform Mailchimp werd opgericht in 2001 en heeft in de loop der jaren een ongelooflijke groei doorgemaakt. 🚀
Hoewel het bedrijf bekend staat om zijn slimme en eigenzinnige advertentiecampagnes, is het ook een geweldig hulpmiddel voor iedereen die e-mailmarketing in zijn bedrijf wil implementeren.
Het is een eenvoudig hulpmiddel om te gebruiken als je het eenmaal onder de knie hebt en de prijs is ideaal voor een breed scala aan budgetten.
Maar als je niet zeker weet waar je moet beginnen, geen zorgen! We hebben deze tutorial samengesteld met stapsgewijze instructies om aan de slag te gaan met Mailchimp. 🤘
En als je op zoek bent naar een lichtgewicht verkoop-CRM in Mailchimp-stijl dat je eenvoudig kunt koppelen aan Mailchimp: check Salesflare out!
1. Leer hoe je de verschillende secties van Mailchimp gebruikt
First things first: we moeten de verschillende tools begrijpen die beschikbaar zijn in het Mailchimp dashboard!
Zoals je kunt zien, kom je op het dashboard terecht zodra je je account hebt ingesteld en bent ingelogd.
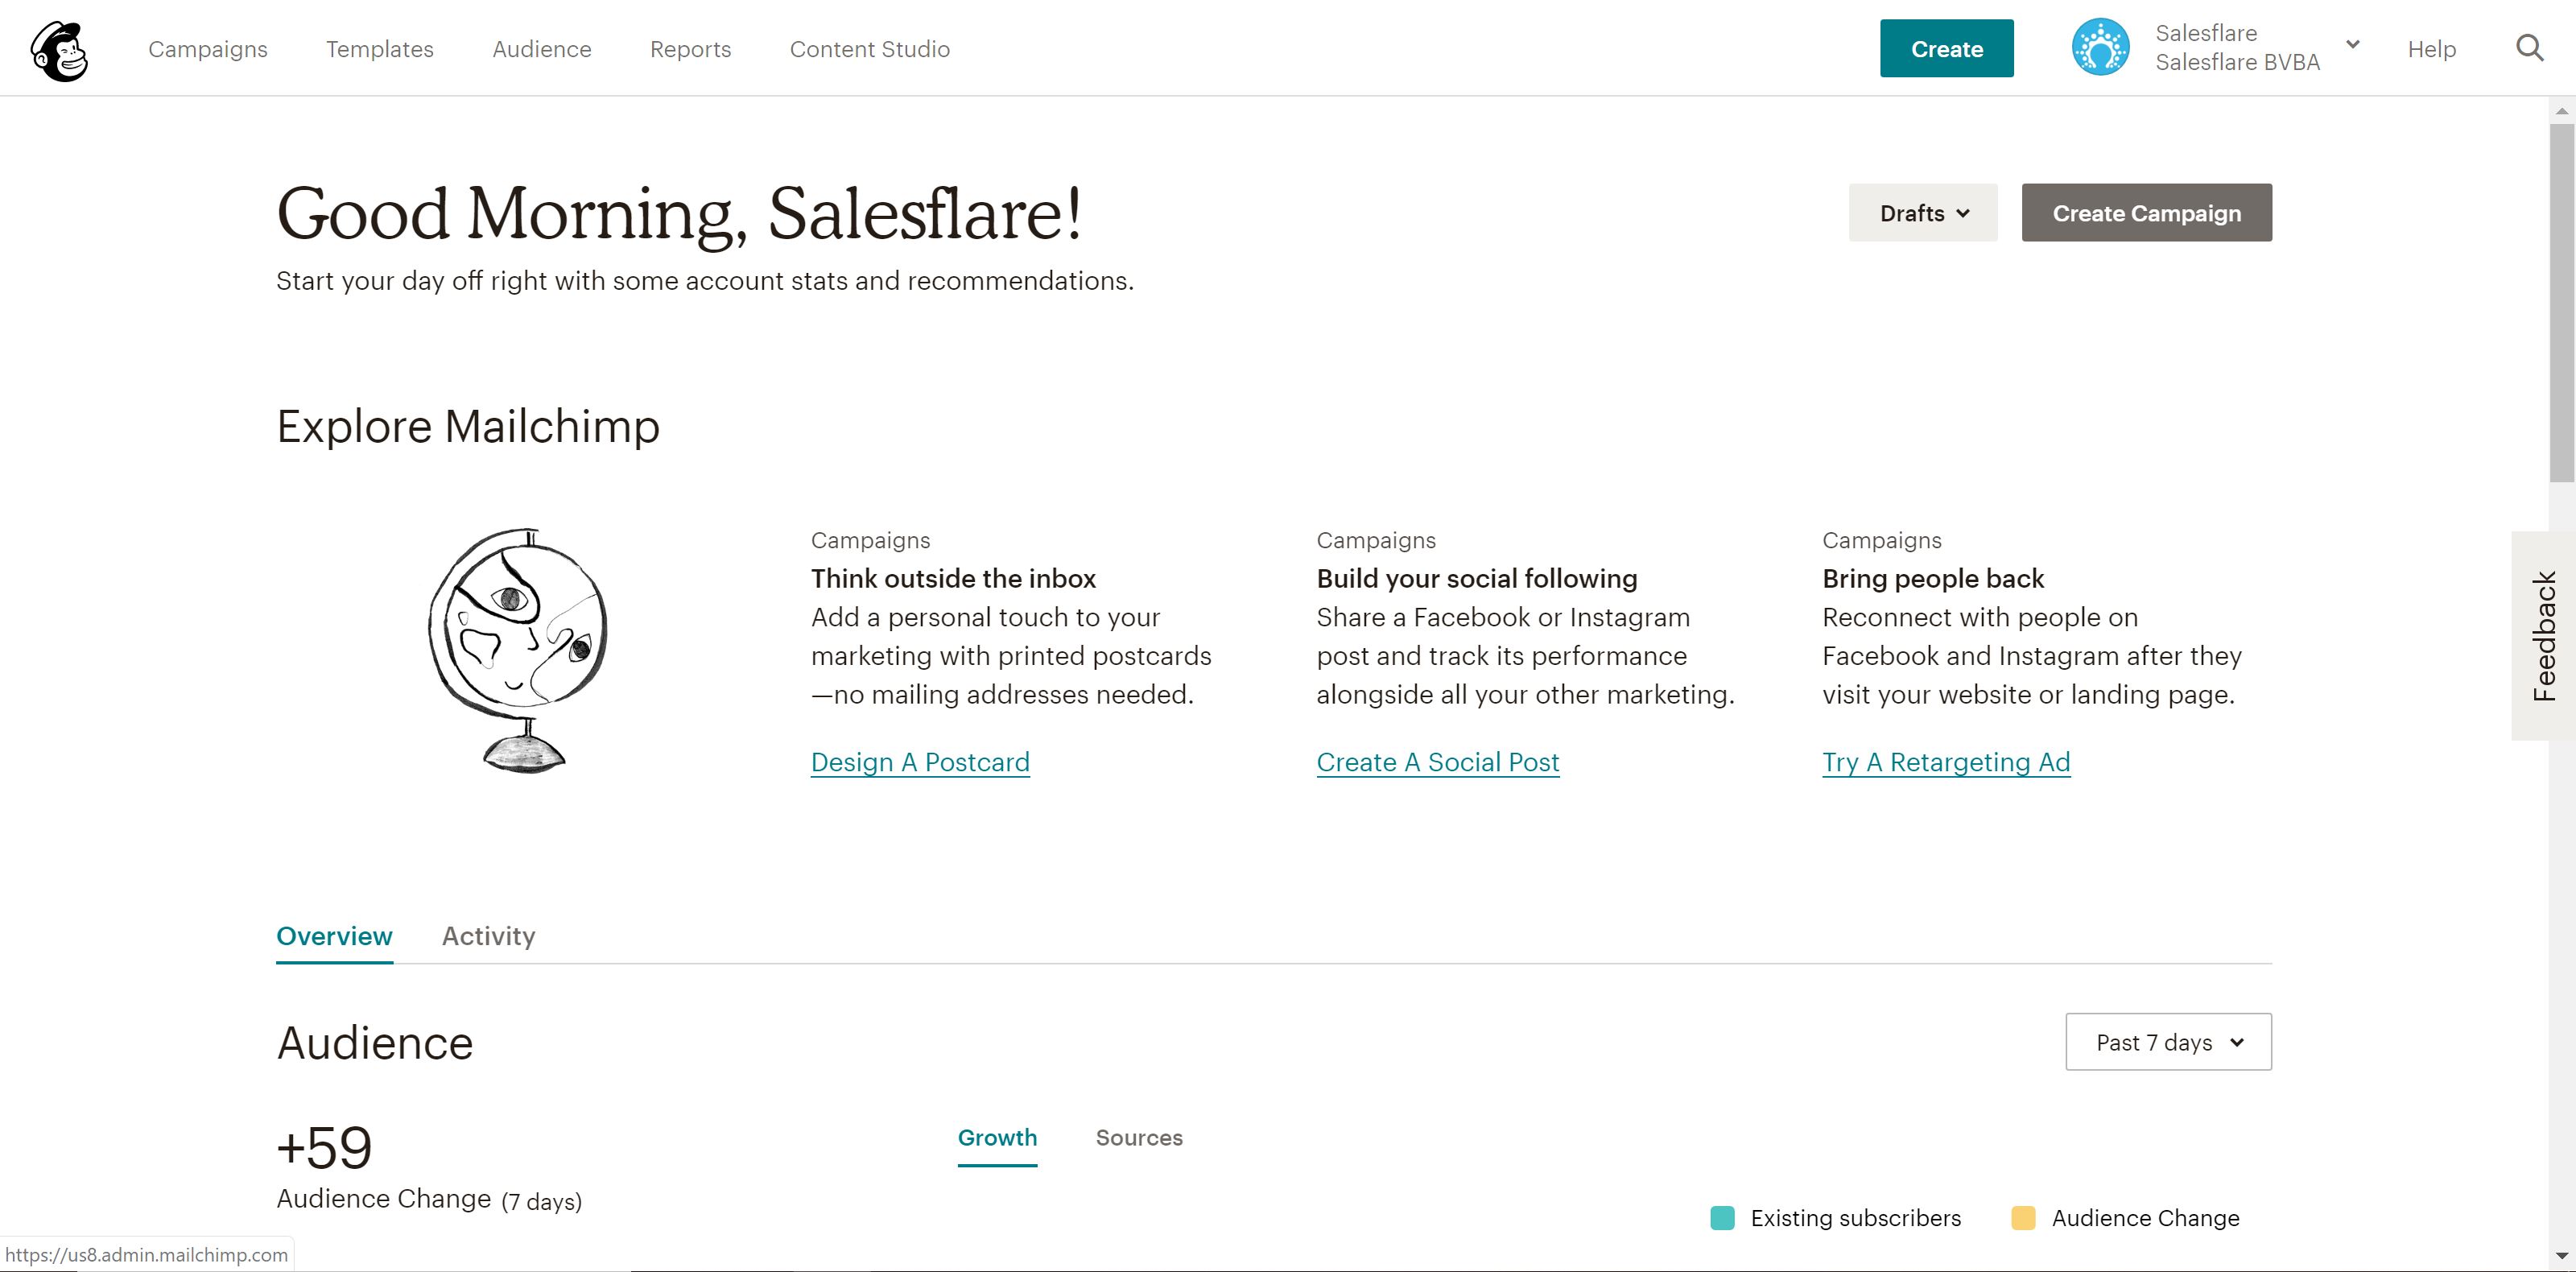
Je zult zien dat er linksboven vijf verschillende tabbladen zijn: Campagnes, Sjablonen, Lijsten, Rapporten en Content Studio.
Campagnes zijn de eigenlijke e-mails, landingspagina's, enz. die je publiceert en verstuurt naar klanten - als onderdeel van je e-mailmarketing. We zullen dit in detail bespreken in stap vier.
Sjablonen is het gedeelte waar je het ontwerp maken en inhoud voor je campagnes - meer hierover in stap drie.
Publiek (voorheen Lijsten) is het gedeelte voor het beheren van je mailingpubliek/lijsten. We bespreken dit in stap twee.
Rapporten - ook een vrij voor de hand liggend onderdeel - is waar je de prestaties van je campagnes kunt bekijken. In principe kun je zien wie wat doet en deze informatie gebruiken om je campagnes te optimaliseren. In stap 8 gaan we dieper in op rapportage.
Inhoud Studio is een vrij nieuwe sectie sinds begin 2019 die je een beter zicht geeft op je creatieve activa, zoals geüploade afbeeldingen en gifs, logo'senz. Super eenvoudig, dus we zullen niet verder in detail treden.
We zullen de eerste vier secties verkennen, evenals enkele extra krachtige geavanceerde functies in deze post.
Dus laten we beginnen! 👊
2. Stel je lijsten samen en stel je inschrijvingsformulier in
Nadat je je hebt aangemeld, helpt Mailchimp je bij het instellen van alles voor je account, zoals je website, het koppelen van sociale media-accounts, enz.
Je kunt zelfs je online winkel koppelen aan Mailchimp, als je werkt in e-commerce. 🛍
Maar na alle administratieve rompslomp is het tijd om de mouwen op te stropen en aan de slag te gaan!
Het eerste en waarschijnlijk belangrijkste dat je moet doen bij het instellen van Mailchimp is het samenstellen van je mailinglijsten - schone, bijgewerkte lijsten van klanten, leads en zakenrelaties waarmee je wilt communiceren.
Tenslotte is het betrekken van je klanten (en potentiële klanten) het punt waarom je Mailchimp in de eerste plaats hebt, toch? 😉
Je kunt beginnen met één lijst, maar je kunt zoveel lijsten maken als je wilt. Let wel op: als je dezelfde contactpersoon op meerdere lijsten hebt, telt die contactpersoon apart mee voor je totale limiet, omdat de lijsten niet met elkaar verbonden zijn.
Je kunt je lijsten natuurlijk segmenteren en taggen - meer daarover hier.
Dit is hoe de prijsstructuur van Mailchimp werkt - ga dus niet te ver door hetzelfde contact aan meerdere lijsten toe te voegen. Het kan heel snel een rommeltje worden!
Nog geen contacten? Mailchimp dekt je. 👍
Het genereert automatisch een inschrijfformulier voor elke lijst die je opbouwt - dit kun je vervolgens gebruiken om meer abonnees te krijgen. Deel het op je website, sociale mediakanalen, waar je maar wilt.
Je kunt deze formulieren zelfs aanpassen met de Form Builder.
Dit is hoe:
1. Ga naar de publiekspagina
2. Selecteer de juiste doelgroep linksboven, klik dan op Beheer doelgroep rechtsboven en kies Aanmeldingsformulieren
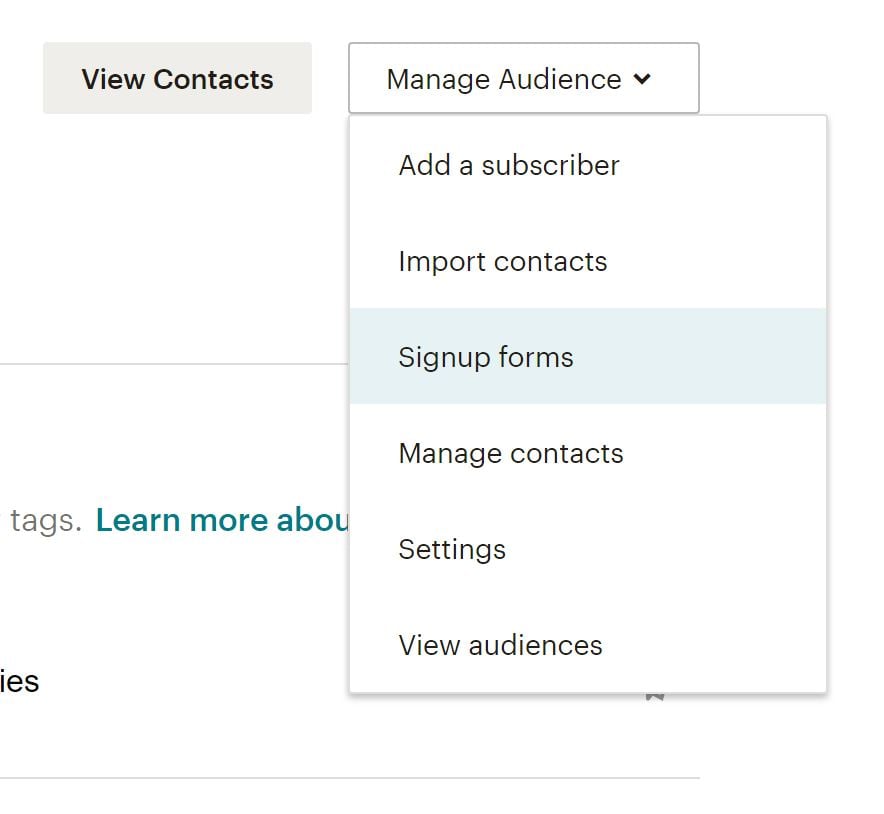 3. Selecteer Formulierenbouwer

4. Klik op het vervolgkeuzemenu Formulieren en e-mails met antwoorden en kies het formulier dat u wilt bewerken
5. Klik op het tabblad Ontwerp
6. Klik door de tabbladen Pagina, Body, Formulieren of MonkeyRewards om de aanpassingsopties te bekijken; gebruik de velden en vervolgkeuzemenu's om de gewenste wijzigingen aan te brengen in de stijlen, kleuren en velden - Mailchimp slaat uw wijzigingen automatisch op.
Als je tevreden bent met het ontwerp, klik je op Opslaan & sluiten. Helemaal klaar!
Kopieer de code voor je formulier en deel deze op al je online kanalen. 🎉
E-mailnieuwsbrief of persoonlijke e-mails op schaal?
Voordat we beginnen met leren hoe we e-mailsjablonen kunnen maken en e-mailcampagnes kunnen versturen, wil ik even controleren of je op de juiste plek bent.
Ben je op zoek naar:
- Stuur een email nieuwsbrief
- Of persoonlijke e-mails op schaal versturen?
Als je hier bent voor optie 1, lees dan verder! Mailchimp is geweldig, of er zijn andere nieuwsbriefsoftware opties voor jou. Wij gebruiken Mailchimp ook voor onze nieuwsbrief. (Als je geïnteresseerd bent, kun je je op de startpagina van onze blog inschrijven voor onze nieuwsbrief). Ga verder en ga naar de volgende sectie!
Als je hier bent voor optie 2, wil je misschien een andere optie overwegen.
Het voordeel van het gebruik van Mailchimp voor dit doel is dat je snel duizenden mensen tegelijk kunt e-mailen.
De nadelen van het gebruik van Mailchimp hiervoor zijn dat:
- Je e-mail ziet er niet echt persoonlijk uit. Het getrainde oog (en mensen zijn tegenwoordig getraind in het detecteren van massamail) zal altijd zien dat het een massamail is.
- Het zal niet in de prioritaire inbox van je publiek terechtkomen. Mailboxen zoals Gmail en Outlook sorteren e-mails die zijn verzonden met een e-mailserviceprovider tegenwoordig in een tabblad met de naam "Promoties" of "Overig".
- Dit resulteert ook in lagere open rates (en dus ook minder kliks en antwoorden).
- En omdat Mailchimp te maken heeft met nogal wat misbruik (door een kleine maar aanzienlijke groep mensen), kan dit er ook voor zorgen dat je e-mail eerder in een spammap terechtkomt.
Wat is dan het alternatief zonder al deze nadelen? Je kunt deze e-mails rechtstreeks vanuit je eigen inbox versturen, op een persoonlijke manier en op grote schaal. Ja, daar is nieuwsbriefsoftware ook voor!
Bekijk onze gids over hoe je op grote schaal massamails verstuurt die er persoonlijk uitzien. We leggen je stap voor stap uit hoe je dit doet!
3. Maak uw eerste e-mailsjabloon
Als het over e-mailmarketing gaat, hoor je veel over ontwerp, sjablonen, campagnes, enz. Maar wat is het verschil tussen sjablonen en campagnes?
Zoals we al eerder aanstipten, is de sjablonenfunctie van Mailchimp in wezen waar je herbruikbare lay-outs voor je inhoud kunt ontwerpen, terwijl campagnes bedoeld zijn voor het verzenden van de daadwerkelijke berichten.
Gelukkig kun je met Mailchimp eenvoudig campagneontwerpen hergebruiken of bestaande campagnes kopiëren, maar als je de tool gebruikt, is het meestal het beste om herbruikbare inhoud in sjablonen te plaatsen en berichtspecifieke inhoud in campagnes.
Laten we het nu hebben over het gebruik van sjablonen! 💪
Zoals je zult zien, zijn er veel vooraf ingestelde sjabloonopties beschikbaar bij Mailchimp. Gebruik deze gerust terwijl je leert hoe je goed ontworpen sjablonen maakt.
Je kunt echter ook helemaal opnieuw beginnen en je eigen sjabloon maken die past bij uw huisstijl en stijl.
Mailchimp bewaart zelfs afbeeldingen die zijn geüpload op je account, zodat je ze kunt hergebruiken in toekomstige sjablonen.
Het bouwen van een mooie e-mailsjabloon is relatief eenvoudig, omdat Mailchimp je de optie geeft om inhoudsblokken te slepen naar je nieuwsbrief.

Zoals je kunt zien, zijn hier een heleboel opties beschikbaar. Van uitlegvideo's tot afbeeldingen en call-to-action knoppen, het is eenvoudig om een e-mail te maken met dynamische en interessante inhoud.
Mailchimp slaat je werk op terwijl je bezig bent en als je klaar bent, kun je de editor opslaan en afsluiten.
Tip: Vergeet niet om samenvoegtags toe te voegen! De gegevens die je hebt toegevoegd aan Mailchimp zoals logo's en je bedrijfsadres worden opgeslagen onder samenvoegtags en helpen je om je merknaam toe te voegen zonder dat je telkens opnieuw informatie moet invoeren. Hier is een geweldige Samenvoeg tags spiekbriefje van Mailchimp om je op weg te helpen.
Zodra je de perfecte e-mail of landingspagina hebt ontworpen, is het tijd om deze naar je publiek te versturen!
4. Maak je eerste campagne in Mailchimp
Campagnes zijn waar je je boodschap naar je publiek gaat sturen - of het nu een advertentie, landingspagina of e-mail is - dus laten we eens kijken hoe we dit kunnen doen!
Een voorbeeld: laten we zeggen dat je een nieuwsbrief wilt maken en naar je publiek wilt sturen. Zodra je de nieuwsbrief in een sjabloon hebt ontwikkeld, is het tijd om je eerste campagne te maken.
Een e-mailcampagne maken:
1. Ga naar Campagnes en klik op Campagne maken
2. Selecteer E-mail, voer een campagnenaam in en klik op Begin
3. Klik in het gedeelte Aan op Ontvangers toevoegen en selecteer de lijst waarnaar je de e-mail wilt verzenden; je kunt ook specifieke segmenten of tags binnen de lijst selecteren als je je publiek op een bepaalde manier hebt gesegmenteerd.
4. Klik op Opslaan en ga verder naar het gedeelte Van; voer de naam en het e-mailadres in waarvan u het bericht wilt ontvangen en klik op Opslaan.
5. Klik vervolgens in het gedeelte Onderwerp op Onderwerp toevoegen en voer uw onderwerp en voorbeeldtekst voor de e-mail in - schrijf iets waardoor uw e-mail opvalt! Klik op Opslaan en ga naar de volgende sectie
6. Klik in het gedeelte Inhoud op Ontwerp e-mail en selecteer de sjabloon die je wilt gebruiken voor je e-mail; Mailchimp toont je de redactiepagina opnieuw zodat je de inhoud nog eens kunt controleren en eventuele last-minute wijzigingen in het ontwerp kunt aanbrengen*.
* Als je wilt, kun je deze stap ook gebruiken om inhoud toe te voegen en je e-mail te ontwerpen in plaats van de Sjabloon-functie te gebruiken om eerder inhoud toe te voegen - het is een persoonlijke voorkeur.
7. Zodra je inhoud klaar is, heb je de optie om je Facebook- en Twitteraccounts te koppelen aan het bericht zodat Mailchimp je campagne automatisch kan delen met je volgers - deze stap is optioneel.
8. Tot slot ziet u onderaan de pagina een lijst met opsommingstekens die samenvat wat u wel en niet opneemt in uw e-mail; zorg ervoor dat u deze lijst bekijkt om er zeker van te zijn dat u alles bijhoudt wat u wilt bijhouden met de e-mail.
9. Klik op Verzenden en bevestig of, als u de e-mail op een later tijdstip wilt verzenden, klik op Plannen en selecteer het tijdstip waarop de e-mail moet worden verzonden.
Gefeliciteerd! Je hebt net je eerste e-mailcampagne op Mailchimp verzonden!

Met de verschillende functies van Mailchimp zul je snel merken dat er veel leuke dingen zijn die je met je inhoud kunt doen, dus neem de tijd om met de tool te spelen en raak vertrouwd met alles wat je tot je beschikking hebt.
In de volgende stappen worden enkele van deze handige functies besproken.
5. Gebruik automatisering, bespaar meer tijd
We zijn grote fans van automatisering hier bij Salesflare, dus het is zeker de moeite waard om te wijzen op de functies voor e-mailautomatisering die beschikbaar zijn voor Mailchimp-gebruikers! 🤓
Van het versturen van onboarding e-mails naar nieuwe klanten tot het creëren van een workflow rond het verwelkomen van nieuwe abonnees, er zijn tal van manieren om jou en je team meer tijd te besparen met het versturen van e-mails.
Hoe krijg je toegang tot deze functie? Stel dat u nieuwe abonnees wilt verwelkomen op uw mailinglijst:
1. Ga naar Campagnes
2. Maak een nieuwe campagne en selecteer Geautomatiseerde e-mail
3. Van daaruit zie je dat er een heleboel geautomatiseerde workflows beschikbaar zijn; voor nu selecteer je Welkom nieuwe abonnees
4. Geef de campagne een naam en selecteer de lijst die je wilt gebruiken voor de automatisering
5. Van hieruit kunt u uw e-mail ontwerpen en alle instellingen naar wens bewerken; u kunt ook andere e-mails aan een workflow toevoegen als u bijvoorbeeld ook onboarding e-mails wilt verzenden. (om hier te komen, klikt u linksboven op "Geavanceerde instellingen gebruiken")

6. Zodra alles is ingesteld, klikt u op Volgende en controleert u alle instellingen dubbel voordat u op Publiceren klikt.
Boem! Je verstuurt nu geautomatiseerde e-mails naar je nieuwe abonnees zonder een vinger uit te steken. 💆♀️
6. Experimenteer met A/B-testen
Weet je niet welk onderwerp je moet gebruiken voor je e-mail? Misschien wil je verschillende teksten op de call-to-action knoppen testen?
Mailchimp begrijpt dat bedrijven hun beste beentje (lees: e-mail) voor willen zetten, dus je kunt A/B-testen gebruiken om dit voor elkaar te krijgen!
A/B-testcampagnes worden opgebouwd in een reeks stappen, net als andere campagnetypes.
Opmerking: Mailchimp raadt aan om combinaties van ten minste 5.000 ontvangers te testen om de meest bruikbare gegevens uit de resultaten te halen. Als je nog niet zoveel abonnees hebt, geen zorgen. Je kunt nog steeds een test opzetten, maar wees je ervan bewust dat de gegevens misschien niet zo nauwkeurig zijn.
Volg deze stappen om een nieuwe A/B-testcampagne te maken:
1. Ga naar Campagnes
2. Klik op E-mail, net alsof u een gewone e-mailcampagne maakt.
3. Selecteer A/B-test
4. Geef je campagne een naam en selecteer de lijst die je wilt e-mailen
5. Klik op Begin
6. Kies de lijst of het segment waarnaar je de campagne wilt sturen
7. Daarna beginnen we met het selecteren van variabelen om te testen; kies uit Onderwerpregel, Van naam, Inhoud en Verzendtijd

8. Klik op de plus- of minpictogrammen om variaties van de variabele toe te voegen of te verwijderen; je kunt één variabele met maximaal drie variaties testen.
9. Elke variatie genereert een campagnecombinatie zoals weergegeven in de Samenvatting; als u bijvoorbeeld drie onderwerpregels wilt testen, moet u drie combinaties van uw campagne maken

10. Klik en versleep de schuifregelaar onder Hoe moeten we uw ontvangers opsplitsen om het percentage van uw ontvangers in te stellen waarnaar u uw testcombinaties wilt verzenden; bekijk het aantal ontvangers dat elke combinatie in de samenvatting zal ontvangen.

Opmerking: Als je Zendtijd test, kun je alleen verzenden naar 100% van de ontvangers op je lijst.
11. Kies of je een winnaar wilt bepalen op basis van openratio, klikratio, totale inkomsten of handmatig; kies vervolgens hoe lang je de test wilt laten lopen

12. Aan het einde van de testfase stuurt Mailchimp de winnende combinatie naar je resterende ontvangers
13. Voer de inhoud van je variatie in het daarvoor bestemde veld in; de instellingen voor het verzenden van variaties verschijnen ook op deze stap

14. Vink de vakjes naast uw voorkeursinstellingen of trackingopties aan om het volgende op te nemen
15. Test Onderwerpregel, Van-naam of Verzendtijd
- 15a. Kies je lay-out in de stap Sjabloon van de Content Builder
- 15b.Ontwerp en test je campagne in de stap Ontwerp van de Content Builder.
- 15c. Als alles is zoals je wilt, klik je op Bevestigen voordat je het verstuurt.
16. Testinhoud
- 16a. Klik op Inhoud toevoegen voor een variatie van uw campagne
- 16b. Kies je lay-out in de stap Sjabloon van de Content Builder
- 16c. In de ontwerpstap van de Content Builder ontwerpt en test u uw campagne. Als alles naar wens is, klikt u op Volgende.
- 16d. Typ in de stap Beschrijving van de Content Builder tekst om de variatie van de inhoud te beschrijven; je abonnees zullen deze beschrijving niet zien, maar het zal je helpen om de verschillen tussen elke variatie te onthouden.
- 16e. Klik op Doorgaan naar inhoud om terug te gaan naar uw inhoudsvariaties
- 16f. Herhaal stap 16a-16e voor elke inhoudsvariatie; gebruik bij de stap Sjabloon een andere sjabloon of selecteer een variatie die u al hebt ontworpen op het tabblad Vorige variaties.
- 16g. Wanneer alles naar wens is, klikt u op Volgende
17. Bevestig alle informatie voor je campagne en plan of verstuur hem dan
Accountgebruikers met het gebruikersniveau Manager of hoger ontvangen een e-mail wanneer er automatisch een winnaar is gekozen, of na vier uur als je nog niet handmatig een winnaar hebt gekozen.
7. Het volledige potentieel van Mailchimp benutten met integraties
Er zijn tal van geweldige integraties beschikbaar met Mailchimp, dus zorg ervoor dat je je gereedschapskist aansluit om nog meer uit het product te halen! 🛠
Je kunt bijvoorbeeld lijsten koppelen aan je WordPress-site voor meer inschrijvingen of zelfs een evenement koppelen aan Eventbrite om deelnemers automatisch toe te voegen aan een mailinglijst. Bovendien zal Mailchimp to Looker Studio integratie je helpen om de resultaten van je e-mailcampagnes te visualiseren en uitgebreide rapporten te maken voor managers en belanghebbenden.
En omdat ze een API hebben om op voort te bouwen, zijn de mogelijkheden vrijwel onbeperkt.
Onze persoonlijke favoriet is natuurlijk de integratie Salesflare heeft met Mailchimp via Zapier.

Je kunt nieuwe Salesflare-contactpersonen toevoegen aan een MailChimp-lijst of zelfs Salesflare-contactpersonen, -accounts en -kansen maken van nieuwe MailChimp-abonnees. 😄
Je hebt hier toegang tot de integrations directory van Mailchimp.
8. MailChimp-rapporten gebruiken om meer te weten te komen over de prestaties van je campagne
Met de rapportagefunctie van Mailchimp kun je zien hoe je publiek omgaat met je inhoud.
Ga gewoon naar Rapporten en selecteer de campagne waarvoor je een rapport wilt zien. Van daaruit kun je alles in meer detail bekijken en krijg je een beter idee van hoe goed een bepaalde campagne heeft gepresteerd.
Er zijn heel wat statistieken waar je naar kunt kijken, dus hier volgt een uitsplitsing:
- Ontvangers: Aantal abonnees naar wie de campagne is verzonden
- Geleverd: Datum en tijd waarop het verzenden van de campagne vanaf de Mailchimp-servers is voltooid
- Openingspercentage: Percentage succesvol afgeleverde campagnes die als open zijn geregistreerd
- Klikfrequentie: Percentage succesvol afgeleverde campagnes die een klik registreerden
- Lijstgemiddelde voor opens en kliks: Gemiddeld percentage opens of kliks op eerdere campagnes die naar deze lijst zijn verzonden
- Gemiddelde voor openen en klikken: Gemiddeld percentage opens of klikken voor campagnes in de geselecteerde branche die voor je account is ingesteld
- Geopend: Aantal ontvangers dat deze campagne een willekeurig aantal keren heeft geopend
- Geklikt: Aantal ontvangers dat op een gevolgde link een willekeurig aantal keren in deze campagne
- Afgeketst: Aantal ontvangers dat zich heeft geregistreerd als harde of zachte bounce
- Uitgeschreven: Aantal abonnees dat zich heeft afgemeld van je lijst met de afmeldlink in deze campagne
- Totaal geopend: Totaal aantal keren dat de campagne werd geopend door ontvangers; deze telling omvat meerdere openingen van individuele ontvangers
- Succesvolle leveringen: Het aantal ontvangers dat niet hard of zacht heeft gebounced op deze campagne
- Kliks per unieke opening: Percentage ontvangers dat zich als open heeft geregistreerd en ook op een link in je campagne heeft geklikt
- Totaal aantal klikken: Totaal aantal keren dat de getraceerde koppelingen door ontvangers werden aangeklikt; deze telling omvat meerdere klikken van individuele ontvangers
- Doorgestuurd: Aantal keren dat de campagne is doorgestuurd via het formulier Doorsturen naar een vriend; deze statistiek houdt alleen rekening met doorsturen via het formulier Doorsturen naar een vriend en kan niet detecteren wanneer een abonnee de doorstuurfunctie in zijn e-mailprogramma gebruikt.
- Voorwaarts opent: Aantal keren dat de campagne is geopend door iemand die de campagne heeft doorgestuurd via het formulier Doorsturen naar een vriend
- Misbruik rapporten: Aantal ontvangers dat uw e-mail als spam heeft gerapporteerd; abonnees die een campagne als spam hebben gerapporteerd, worden automatisch van uw lijst verwijderd.
- Laatst geopend: Het meest recente geval waarin een ontvanger de campagne heeft geopend
- Laatst geklikt: Het meest recente geval waarin een ontvanger op een gevolgde koppeling in de campagne heeft geklikt
- 24-uursprestatie: Een grafiek met de activiteit van abonnees (opens en clicks) voor de eerste 24 uur nadat de campagne is verzonden
- Top aangeklikte links: De URL's waarop het meest is geklikt in de campagne.
- Abonnees met meeste opens: Abonnees die de campagne het vaakst hebben geopend
- Sociale prestaties: Geeft een overzicht van hoe goed uw campagne het doet op verschillende sociale media
- Top locaties: Toont waar ter wereld je abonnees je campagnes openen
Er zijn hier een heleboel statistieken, dus neem even de tijd om ze allemaal te bekijken en een beter idee te krijgen van welke statistieken je in de loop van de tijd wilt verbeteren. 📈
A/B-testen, zoals genoemd in stap zes, is perfect voor het testen van verschillende variabelen en het bepalen van de beste formule voor succesvolle e-mailcampagnes - de statistieken voor alle A/B-testen zijn ook opgenomen in campagnerapporten.
Daar heb je het! Gebruik deze gids om aan de slag te gaan met Mailchimp en boeiende e-mails te sturen naar je klanten en leads. 👏
Hoewel deze gids het grootste deel van de functies binnen Mailchimp behandelt, zijn er nog genoeg andere dingen die je zelf kunt ontdekken en uitproberen.
Gelukkig bieden ze een geweldige knowledge base ontworpen om al je brandende vragen over een breed scala aan functies en onderwerpen te beantwoorden - dus waar wacht je nog op?
Veel plezier met e-mailen! 💌
Nogmaals, als je op zoek bent naar een lichtgewicht verkoop-CRM in Mailchimp-stijl dat je gemakkelijk kunt koppelen aan Mailchimp: check Salesflare! We zullen goed voor je zorgen.

We hopen dat je deze post leuk vond. Als je het leuk vond, vertel het dan verder!
👉 Je kunt @salesflare volgen op Twitter, Facebook en LinkedIn.
Laatst bijgewerkt:
- 22+ Beste verkooppodcasts die je moet bekijken in 2026 - 8 augustus 2024
- Koude oproepscripts voor echte mensen - 21 september 2023
- De 25+ beste verkooptools om uw team te helpen succesvol te zijn - 10 augustus 2023