Der ultimative Leitfaden für Mailchimp
So verwenden Sie Mailchimp
Ach ja, MailKimp.
Oder ist es KaleLimp?
...MailShrimp? 🤔

Wie man den Namen auch ausspricht, die in Atlanta ansässige Plattform für Marketingautomatisierung und E-Mail-Marketing Mailchimp wurde 2001 gegründet und hat im Laufe der Jahre ein unglaubliches Wachstum erlebt. 🚀
Das Unternehmen ist zwar für seine cleveren und skurrilen Werbekampagnen bekannt, aber es ist auch ein großartiges Tool für alle, die versuchen, E-Mail-Marketing in ihr Unternehmen zu integrieren.
Sobald man den Dreh raus hat, ist es ein einfach zu bedienendes Werkzeug, und seine Preise sind ideal für eine Vielzahl von Budgets.
Aber wenn Sie nicht wissen, wo Sie anfangen sollen, keine Sorge! Wir haben dieses Tutorial mit einer Schritt-für-Schritt-Anleitung für die ersten Schritte mit Mailchimp zusammengestellt. 🤘
Oh, und wenn Sie nach einem leichtgewichtigen Vertriebs-CRM im Stil von Mailchimp suchen, das Sie einfach mit Mailchimp verbinden können: Check Salesflare out!
1. Lernen Sie, wie Sie die verschiedenen Bereiche von Mailchimp nutzen können
Das Wichtigste zuerst: Wir müssen die verschiedenen Tools verstehen, die im Mailchimp-Dashboard verfügbar sind!
Wie Sie sehen können, gelangen Sie nach der Einrichtung Ihres Kontos und der Anmeldung zum Dashboard.
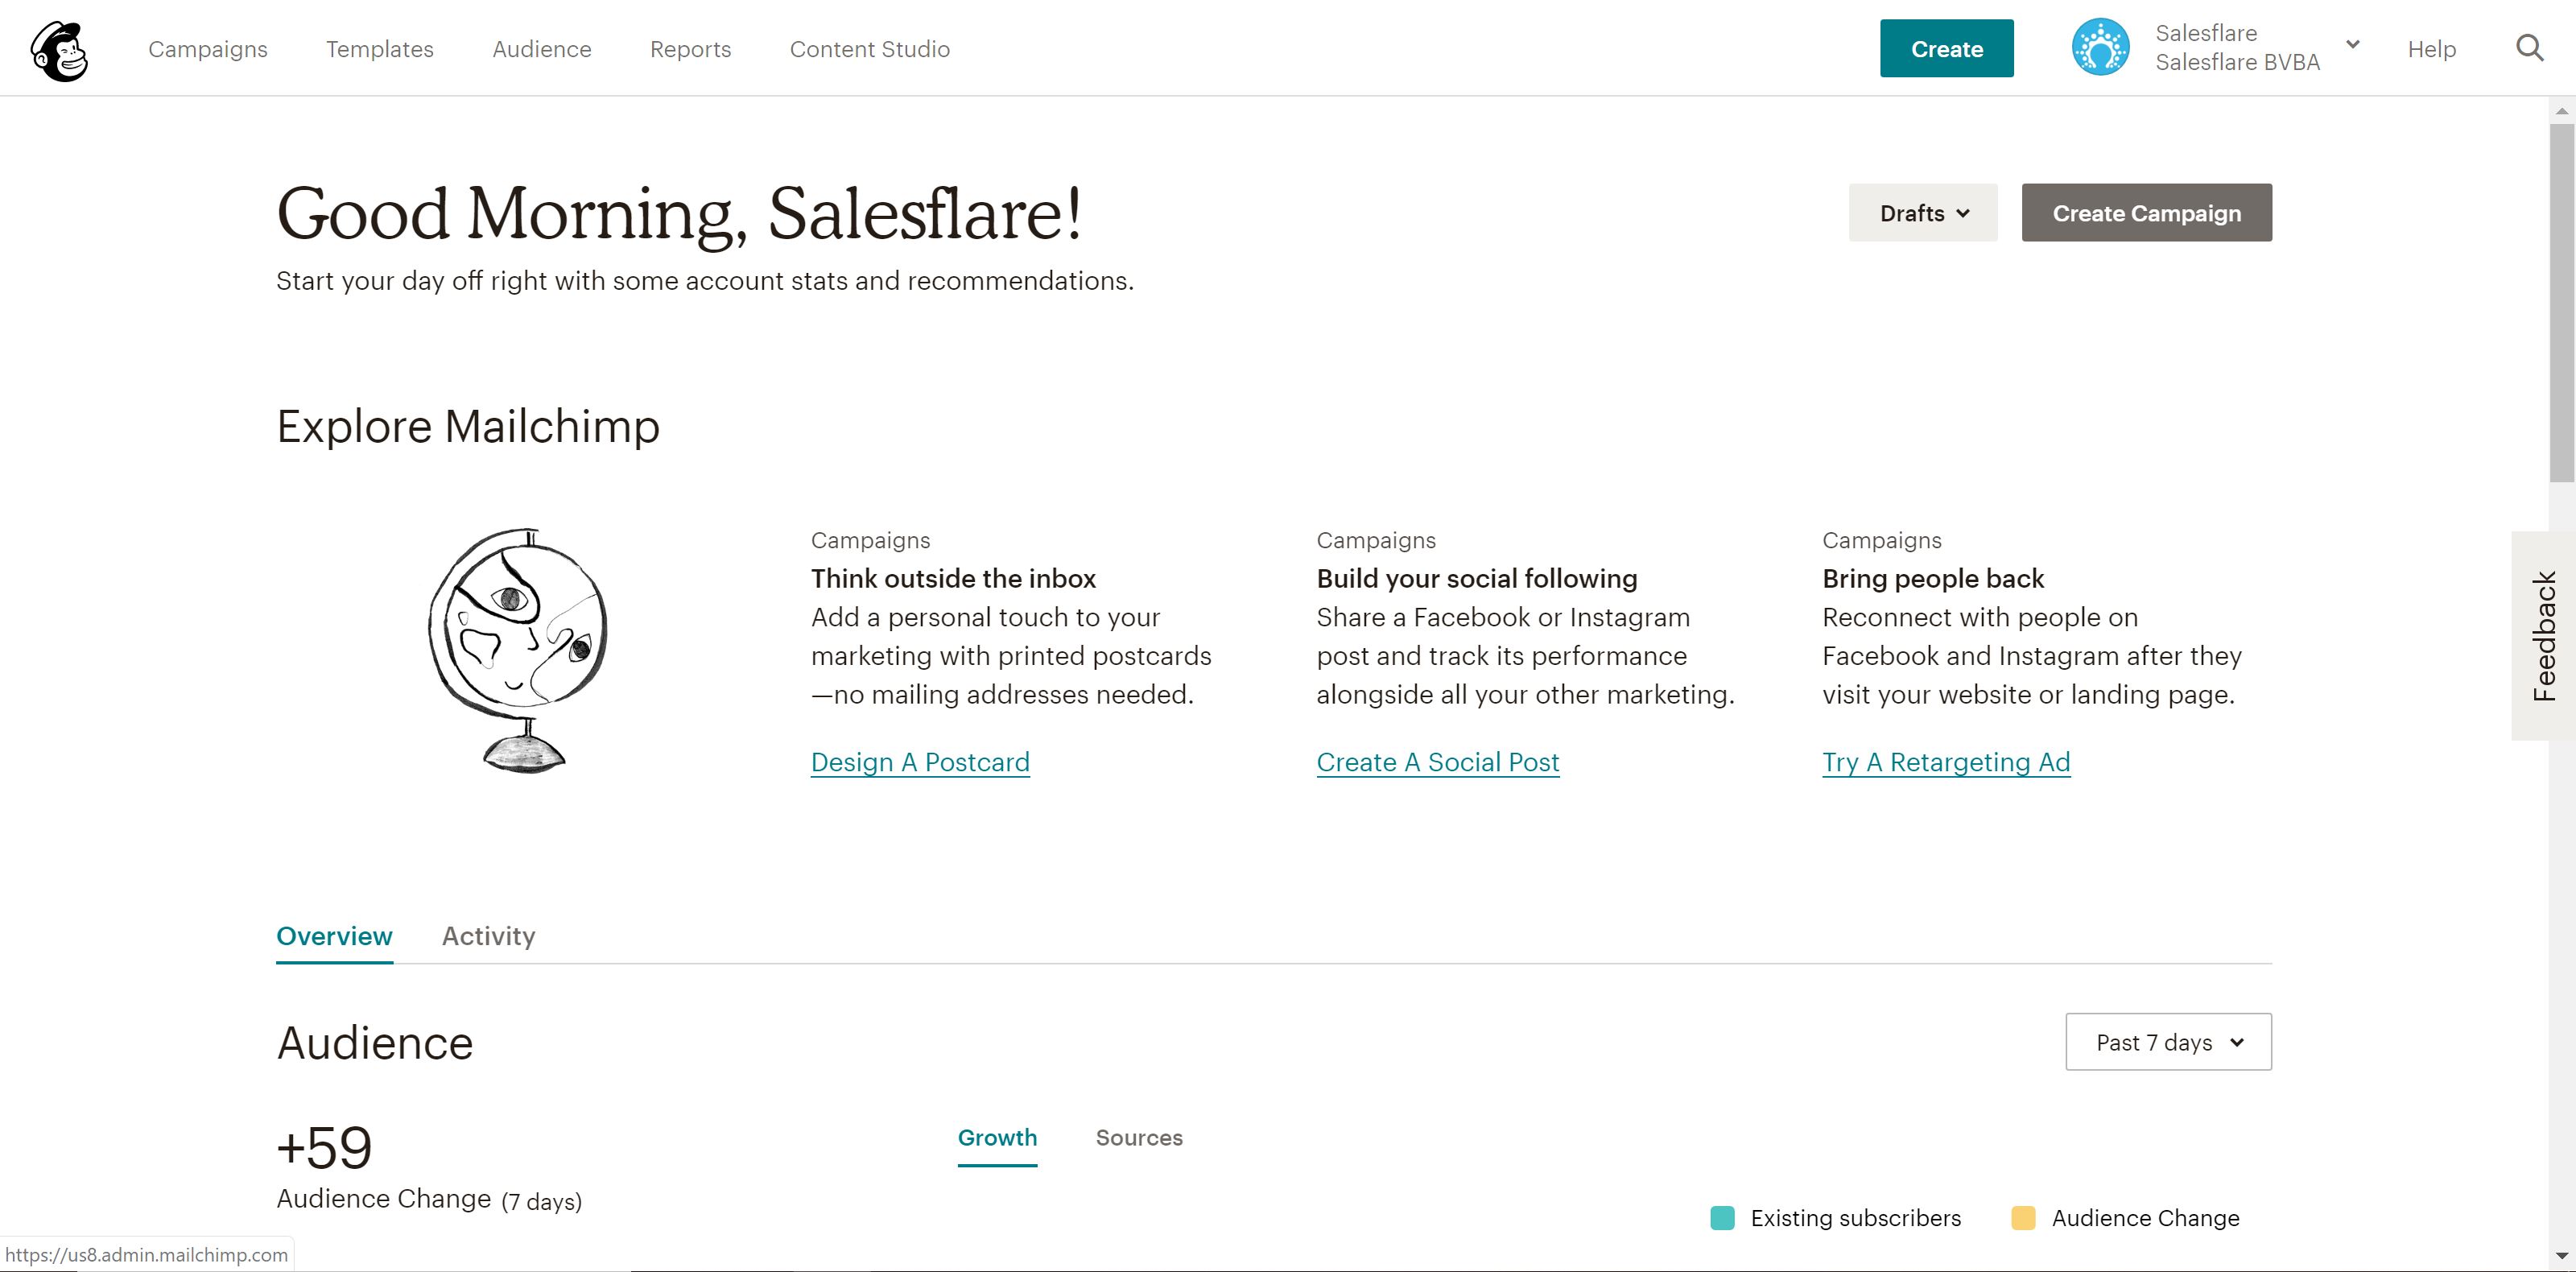
Sie werden feststellen, dass es oben links auf dem Bildschirm fünf verschiedene Registerkarten gibt: Kampagnen, Vorlagen, Listen, Berichte und Content Studio.
Kampagnen sind die eigentlichen E-Mails, Landing Pages usw., die Sie veröffentlichen und an Kunden versenden - als Teil Ihrer E-Mail-Marketing. Wir werden dies in Schritt vier im Detail besprechen.
Schablonen ist der Bereich, in dem Sie den Entwurf erstellen und Inhalte für Ihre Kampagnen - mehr dazu in Schritt drei.
Publikum (ehemals Listen) ist der Bereich, in dem Sie, wie nicht anders zu erwarten, Ihre Mailing-Zielgruppen/Listen verwalten. Wir werden dies in Schritt zwei besprechen.
Berichte - ist ebenfalls ein ziemlich selbsterklärender Bereich, in dem Sie die Leistung Ihrer Kampagnen überprüfen können. Im Grunde können Sie sehen, wer mit was interagiert, und diese Informationen nutzen, um Ihre Kampagnen zu optimieren. Auf die Berichterstattung gehen wir in Schritt 8 näher ein.
Inhalt Studio ist ein ziemlich neuer Bereich seit Anfang 2019, der dir einen besseren Überblick über deine kreativen Assets, wie hochgeladene Bilder und Gifs, gibt, Logos, usw. Super einfach, deshalb gehen wir nicht weiter ins Detail.
In diesem Beitrag werden wir die ersten vier Abschnitte sowie einige besonders leistungsstarke fortgeschrittene Funktionen vorstellen.
Fangen wir also an! 👊
2. Erstellen Sie Ihre Listen und richten Sie Ihr Anmeldeformular ein
Nach der Anmeldung führt Mailchimp Sie durch die Einrichtung Ihres Kontos, z. B. Ihrer Website, der Verknüpfung von Social-Media-Konten usw.
Sie können sogar Ihr Online-Geschäft mit Mailchimp verbinden, wenn Sie im e-commerce arbeiten. 🛍
Aber nach all dem Verwaltungskram ist es an der Zeit, die Ärmel hochzukrempeln und sich an die Arbeit zu machen!
Das erste und wahrscheinlich wichtigste, was Sie bei der Einrichtung von Mailchimp tun sollten, ist die Erstellung Ihrer Mailinglisten - saubere, aktuelle Listen der Kunden, Leads und Geschäftsverbindungen, mit denen Sie kommunizieren möchten.
Schließlich ist die Einbindung Ihrer Kunden (und potenziellen Kunden) der Grund, warum Sie sich Mailchimp überhaupt angeschafft haben, oder? 😉 .
Sie können mit nur einer Liste beginnen, aber Sie können so viele Listen erstellen, wie Sie für sinnvoll halten. Beachten Sie jedoch: Wenn Sie denselben Kontakt in mehreren Listen haben, wird dieser Kontakt separat für Ihre Gesamtabonnentengrenze gezählt, da die Listen nicht miteinander verbunden sind.
Sie können Ihre Listen natürlich segmentieren und taggen - mehr dazu hier.
So funktioniert die Preisstruktur von Mailchimp. Übertreiben Sie es also nicht mit dem Hinzufügen desselben Kontakts zu mehreren Listen. Das kann sehr schnell unübersichtlich werden!
Noch keine Kontakte? Mailchimp hat die Lösung für Sie. 👍
Für jede Liste, die Sie erstellen, wird automatisch ein Anmeldeformular generiert, das Sie dann nutzen können, um weitere Abonnenten zu gewinnen. Teilen Sie es auf Ihrer Website, in den sozialen Medien, wo immer Sie möchten.
Sie können diese Formulare sogar mit dem Form Builder anpassen.
So geht's:
1. Gehen Sie zur Seite "Publikum
2. Wählen Sie oben links die richtige Zielgruppe aus, klicken Sie dann oben rechts auf Zielgruppe verwalten und wählen Sie Anmeldeformulare
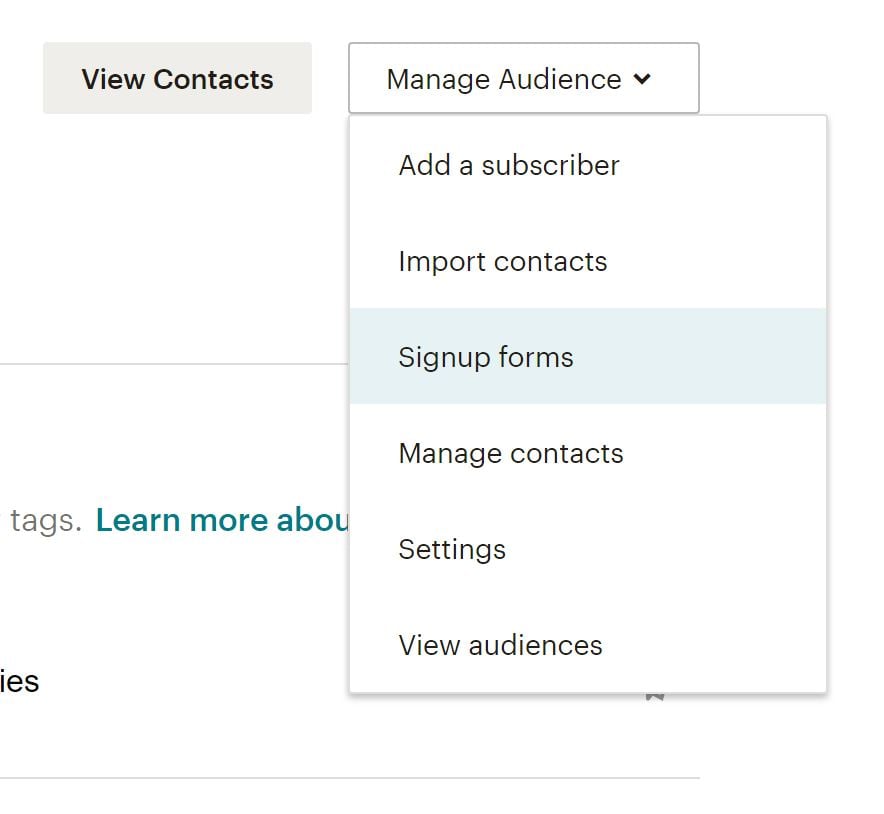 3. form builder auswählen

4. Klicken Sie auf das Dropdown-Menü Formulare und Antwort-E-Mails und wählen Sie das Formular aus, das Sie bearbeiten möchten
5. Klicken Sie unten auf die Registerkarte Design it
6. Klicken Sie sich durch die Registerkarten "Seite", "Textkörper", "Formulare" oder "MonkeyRewards", um die Anpassungsoptionen zu überprüfen; verwenden Sie die Felder und Dropdown-Menüs, um die gewünschten Änderungen an den Stilen, Farben und Feldern vorzunehmen - Mailchimp speichert Ihre Änderungen automatisch
Wenn Sie mit dem Entwurf zufrieden sind, klicken Sie auf Speichern und Schließen. Das war's!
Kopieren Sie den Code für Ihr Formular und teilen Sie ihn auf allen Ihren Online-Kanälen. 🎉
E-Mail-Newsletter oder persönliche E-Mails in großem Umfang?
Bevor wir mit der Erstellung von E-Mail-Vorlagen und dem Versenden von E-Mail-Kampagnen beginnen, möchte ich kurz prüfen, ob Sie hier richtig sind.
Sie suchen:
- Versenden Sie einen E-Mail-Newsletter
- Oder persönliche E-Mails in großem Umfang versenden?
Wenn Sie wegen Option 1 hier sind, lesen Sie weiter! Mailchimp ist großartig, oder es gibt andere Newsletter-Software für Sie. Wir verwenden auch Mailchimp für unseren Newsletter. (Sie können unseren Newsletter auf der Homepage unseres Blogs abonnieren, wenn Sie daran interessiert sind!) Weiter geht's zum nächsten Abschnitt!
Wenn Sie wegen Option 2 hier sind, sollten Sie vielleicht eine andere Option in Betracht ziehen.
Der Vorteil der Verwendung von Mailchimp für diesen Zweck ist, dass Sie Tausende von Personen gleichzeitig und schnell per E-Mail erreichen können.
Der Nachteil der Verwendung von Mailchimp für diese Zwecke ist, dass:
- Ihre E-Mail wird nicht wirklich persönlich aussehen. Das geschulte Auge (und die Menschen sind heutzutage darin geschult, Massen-E-Mails zu erkennen) wird immer erkennen, dass es sich um eine Massen-E-Mail handelt.
- Sie wird nicht im bevorzugten Posteingang Ihrer Zielgruppe landen. Postfächer wie Gmail und Outlook sortieren heutzutage E-Mails, die mit einem E-Mail-Dienstanbieter versendet wurden, in einer Registerkarte namens "Promotions" oder "Other".
- Dies führt auch zu niedrigeren Öffnungsraten (und somit auch zu weniger Klicks und Antworten).
- Und da Mailchimp mit einem gewissen Missbrauch (durch eine kleine, aber bedeutende Gruppe von Personen) zu kämpfen hat, kann dies auch dazu führen, dass Ihre E-Mail mit größerer Wahrscheinlichkeit in einem Spam-Ordner gefangen wird.
Was ist also die Alternative, die nicht all diese Nachteile hat? Sie können diese E-Mails direkt von Ihrem eigenen Posteingang aus versenden, auf persönliche Weise und in großem Umfang. Ja, auch dafür gibt es Newsletter-Software!
Sehen Sie sich einfach unseren Leitfaden an wie man Massen-E-Mails in großem Umfang versendet, die persönlich wirken. Wir erklären Ihnen Schritt für Schritt, wie Sie dabei vorgehen können!
3. Erstellen Sie Ihre erste E-Mail-Vorlage
Wenn es um E-Mail-Marketing geht, hört man viel über Design, Vorlagen, Kampagnen usw. Aber was ist der Unterschied zwischen Vorlagen und Kampagnen?
Wie bereits erwähnt, dient die Vorlagenfunktion von Mailchimp im Wesentlichen dazu, wiederverwendbare Layouts für Ihre Inhalte zu entwerfen, während Kampagnen für den Versand der eigentlichen Nachrichten gedacht sind.
Zum Glück macht es Mailchimp Ihnen leicht, Kampagnendesigns wiederzuverwenden oder bestehende Kampagnen zu replizieren, aber wenn Sie das Tool verwenden, ist es in der Regel am besten, wiederverwendbare Inhalte in Vorlagen und nachrichtenspezifische Inhalte in Kampagnen zu packen.
Lassen Sie uns nun über die Verwendung von Vorlagen sprechen! 💪
Wie Sie sehen werden, gibt es viele voreingestellte Vorlagenoptionen von Mailchimp. Sie können diese gerne verwenden, wenn Sie lernen, wie man gut gestaltete Vorlagen erstellt.
Sie können aber auch bei Null anfangen und eine eigene Vorlage erstellen, die Ihrem Branding und Stil entspricht.
Mailchimp speichert sogar Bilder, die auf Ihr Konto hochgeladen werden, so dass Sie sie in zukünftigen Vorlagen wiederverwenden können.
Die Erstellung einer schönen E-Mail-Vorlage ist relativ einfach, da Mailchimp Ihnen die Möglichkeit bietet, Inhaltsblöcke per Drag-and-Drop in Ihren Newsletter zu ziehen.

Wie Sie sehen können, gibt es hier eine ganze Reihe von Optionen. Von Erklärungsvideos über Bilder bis hin zu Call-to-Action-Buttons ist es ein Leichtes, eine E-Mail mit dynamischen und interessanten Inhalten zu erstellen.
Mailchimp speichert Ihre Arbeit, während Sie arbeiten, und wenn Sie fertig sind, können Sie den Editor speichern und beenden.
Tipp: Vergessen Sie nicht, die Merge-Tags hinzuzufügen! Die Daten, die Sie zu Mailchimp hinzugefügt haben, wie z.B. Logos und Ihre Geschäftsadresse werden unter Merge-Tags gespeichert und helfen Ihnen dabei, Ihr Branding hinzuzufügen, ohne dass Sie die Informationen jedes Mal neu eingeben müssen. Hier ist eine fantastische Spickzettel für Merge-Tags von Mailchimp, um Ihnen den Einstieg zu erleichtern.
Wenn Sie die perfekte E-Mail oder Landing Page entworfen haben, ist es nun an der Zeit, sie an Ihre Zielgruppe zu versenden!
4. Erstellen Sie Ihre erste Kampagne in Mailchimp
Mit Kampagnen senden Sie Ihre Botschaft an Ihr Publikum - sei es eine Anzeige, eine Landing Page oder eine E-Mail - also schauen wir uns an, wie das geht!
Ein Beispiel: Nehmen wir an, Sie möchten einen Newsletter erstellen und an Ihre Zielgruppe verschicken. Sobald Sie den Newsletter in einer Vorlage entwickelt haben, können Sie Ihre erste Kampagne erstellen.
So erstellen Sie eine E-Mail-Kampagne:
1. Gehen Sie zu Kampagnen und klicken Sie auf Kampagne erstellen
2. Wählen Sie E-Mail, geben Sie einen Kampagnennamen ein und klicken Sie auf Beginnen.
3. Klicken Sie im Abschnitt "An" auf "Empfänger hinzufügen" und wählen Sie die Liste aus, an die Sie die E-Mail senden möchten. Sie können auch bestimmte Segmente oder Tags innerhalb der Liste auswählen, wenn Sie Ihr Publikum auf eine bestimmte Weise segmentiert haben.
4. Klicken Sie auf Speichern und gehen Sie weiter zum Abschnitt Von; geben Sie den Namen und die E-Mail-Adresse ein, von der die Nachricht kommen soll, und klicken Sie auf Speichern
5. Als Nächstes klicken Sie im Abschnitt Betreff auf Betreff hinzufügen und geben Sie den Betreff und den Vorschautext für die E-Mail ein - schreiben Sie etwas, das Ihre E-Mail hervorhebt! Klicken Sie auf Speichern und fahren Sie mit dem nächsten Abschnitt fort
6. Klicken Sie im Abschnitt "Inhalt" auf "E-Mail entwerfen" und wählen Sie die Vorlage aus, die Sie für Ihre E-Mail verwenden möchten. Mailchimp zeigt Ihnen erneut die Editorseite an, damit Sie den Inhalt noch einmal überprüfen und eventuelle Änderungen am Design in letzter Minute vornehmen können*.
* Wenn Sie es vorziehen, können Sie diesen Schritt auch nutzen, um Inhalte hinzuzufügen und Ihre E-Mail zu gestalten, anstatt die Vorlagenfunktion für das Hinzufügen von Inhalten zu nutzen - das ist eine persönliche Vorliebe.
7. Sobald Ihr Inhalt fertig ist, haben Sie die Möglichkeit, Ihre Facebook- und Twitter-Konten mit der Nachricht zu verbinden, damit Mailchimp Ihre Kampagne automatisch an Ihre Follower weitergeben kann - dieser Schritt ist optional
8. Schließlich sehen Sie unten auf der Seite eine Liste mit Aufzählungspunkten, die zusammenfasst, was Sie in Ihre E-Mail aufnehmen und was nicht; überprüfen Sie diese Liste, um sicherzustellen, dass Sie alles erfassen, was Sie in der E-Mail erfassen möchten
9. Klicken Sie auf Senden und bestätigen Sie, oder, wenn Sie die E-Mail zu einem späteren Zeitpunkt senden möchten, klicken Sie auf Planen und wählen Sie den Zeitpunkt aus, zu dem die E-Mail versendet werden soll
Herzlichen Glückwunsch! Sie haben gerade Ihre erste E-Mail-Kampagne mit Mailchimp versendet!

Mit den verschiedenen Funktionen von Mailchimp werden Sie schnell feststellen, dass Sie mit Ihren Inhalten eine Menge Spaß haben können. Nehmen Sie sich also etwas Zeit, um mit dem Tool herumzuspielen und sich mit allen Möglichkeiten vertraut zu machen.
In den nächsten Schritten werden einige dieser praktischen Funktionen erläutert, also fangen wir an.
5. Automatisierung nutzen, mehr Zeit sparen
Wir sind große Fans der Automatisierung hier bei Salesflare, daher ist es sicherlich wert, auf die E-Mail-Automatisierungsfunktionen hinzuweisen, die Mailchimp-Nutzern zur Verfügung stehen! 🤓
Vom Versenden von Einführungs-E-Mails an neue Kunden bis hin zum Erstellen eines Workflows zur Begrüßung neuer Abonnenten gibt es viele Möglichkeiten, wie Sie und Ihr Team beim Versenden von E-Mails mehr Zeit sparen können.
Wie können Sie auf diese Funktion zugreifen? Nehmen wir an, Sie möchten neue Abonnenten auf Ihrer Mailingliste begrüßen:
1. Gehen Sie zu Kampagnen
2. Erstellen Sie eine neue Kampagne und wählen Sie Automatisierte E-Mail
3. Dort sehen Sie, dass es eine Menge automatisierter Arbeitsabläufe gibt; wählen Sie zunächst Welcome new subscribers
4. Geben Sie der Kampagne einen Namen und wählen Sie die Liste, die Sie für die Automatisierung verwenden möchten
5. Von hier aus können Sie Ihre E-Mail gestalten und alle Einstellungen nach Ihren Wünschen bearbeiten. Sie können auch andere E-Mails zu einem Workflow hinzufügen, wenn Sie z. B. auch Einführungs-E-Mails versenden möchten. (um hierher zu gelangen, klicken Sie oben links auf "Erweiterte Einstellungen verwenden")

6. Wenn alles eingerichtet ist, klicken Sie auf Weiter und überprüfen Sie alle Einstellungen, bevor Sie auf Veröffentlichen klicken.
Bumm! Sie senden jetzt automatisierte E-Mails an Ihre neuen Abonnenten, ohne einen Finger zu rühren. 💆♀️
6. Experimentieren Sie mit A/B-Tests
Sind Sie unschlüssig, welchen Betreff Sie für Ihre E-Mail verwenden sollen? Vielleicht möchten Sie verschiedene Texte für die Call-to-Action-Buttons testen?
Mailchimp weiß, dass Unternehmen sich von ihrer besten Seite zeigen wollen (sprich: per E-Mail), daher können Sie A/B-Tests nutzen, um dies zu erreichen!
A/B-Testing-Kampagnen werden wie andere Kampagnentypen in einer Reihe von Schritten aufgebaut.
Hinweis: Mailchimp empfiehlt, Kombinationen von mindestens 5.000 Empfängern zu testen, um die nützlichsten Daten aus den Ergebnissen zu erhalten. Wenn Sie noch nicht so viele Abonnenten haben, machen Sie sich keine Sorgen. Sie können trotzdem einen Test einrichten, aber seien Sie sich bewusst, dass die Daten möglicherweise nicht so genau sind.
Um eine neue A/B-Testkampagne zu erstellen, gehen Sie folgendermaßen vor:
1. Gehen Sie zu Kampagnen
2. Klicken Sie auf E-Mail, so als ob Sie eine normale E-Mail-Kampagne erstellen würden.
3. A/B-Test auswählen
4. Benennen Sie Ihre Kampagne und wählen Sie die Liste aus, die Sie per E-Mail versenden möchten.
5. Klicken Sie auf Beginnen
6. Wählen Sie die Liste oder das Segment, an das Sie Ihre Kampagne senden möchten
7. Dann beginnen wir mit der Auswahl der zu testenden Variablen; wählen Sie aus Betreffzeile, Absendername, Inhalt und Sendezeit

8. Klicken Sie auf die Plus- oder Minus-Symbole, um Variationen der Variable hinzuzufügen oder zu entfernen; Sie können eine Variable mit bis zu drei Variationen testen
9. Jede Variante erzeugt eine Kampagnenkombination, wie in der Zusammenfassung gezeigt; um beispielsweise drei Betreffzeilen zu testen, müssen Sie drei Kombinationen Ihrer Kampagne erstellen

10. Klicken Sie unter Wie sollen wir Ihre Empfänger aufteilen? auf den Schieberegler und ziehen Sie ihn, um den Prozentsatz der Empfänger festzulegen, an die Sie Ihre Testkombinationen senden möchten.

Anmerkung: Wenn Sie die Sendezeit testen, können Sie nur an 100% der Empfänger in Ihrer Liste senden.
11. Wählen Sie, ob Sie den Gewinner auf der Grundlage der Öffnungsrate, der Klickrate, des Gesamtumsatzes oder manuell ermitteln möchten; wählen Sie dann, wie lange der Test laufen soll

12. Am Ende der Testphase sendet Mailchimp die Gewinnerkombination an die verbleibenden Empfänger
13. Geben Sie den Inhalt Ihrer Variation in das dafür vorgesehene Feld ein; die Einstellungen für die Sendezeitvariationen erscheinen ebenfalls in diesem Schritt

14. Kreuzen Sie die Kästchen neben den von Ihnen bevorzugten Einstellungen oder Verfolgungsoptionen an, um Folgendes einzuschließen
15. Betreffzeile, Absendername oder Sendezeit testen
- 15a. Wählen Sie Ihr Layout im Schritt Vorlage des Content Builders
- 15b. Entwerfen und testen Sie Ihre Kampagne im Schritt Design des Content Builders.
- 15c. Wenn alles Ihren Vorstellungen entspricht, klicken Sie vor dem Senden auf Bestätigen.
16. Test Inhalt
- 16a. Klicken Sie auf Inhalt hinzufügen für eine Variante Ihrer Kampagne
- 16b. Wählen Sie Ihr Layout im Schritt Vorlage des Content Builders
- 16c. Im Schritt Design des Content Builders entwerfen und testen Sie Ihre Kampagne; wenn alles Ihren Vorstellungen entspricht, klicken Sie auf Weiter
- 16d. Geben Sie im Schritt "Beschreibung" des Content Builders einen Text ein, um die Variation des Inhalts zu beschreiben; Ihre Abonnenten werden diese Beschreibung nicht sehen, aber sie wird Ihnen helfen, sich an die Unterschiede zwischen den einzelnen Variationen zu erinnern
- 16e. Klicken Sie auf Weiter zum Inhalt, um zu Ihren Inhaltsvarianten zurückzukehren
- 16f. Wiederholen Sie die Schritte 16a-16e für jede Inhaltsvariation; verwenden Sie im Schritt Vorlage eine andere Vorlage oder wählen Sie eine Variation, die Sie bereits auf der Registerkarte Vorherige Variationen entworfen haben
- 16g. Wenn alles Ihren Vorstellungen entspricht, klicken Sie auf Weiter
17. Bestätigen Sie alle Informationen für Ihre Kampagne und planen oder senden Sie sie dann
Kontonutzer mit einer Benutzerebene Manager oder höher erhalten eine E-Mail, wenn ein Gewinner automatisch ausgewählt wurde, oder nach vier Stunden, wenn Sie noch keinen Gewinner manuell ausgewählt haben.
7. Schöpfen Sie das volle Potenzial von Mailchimp mit Integrationen aus
Mit Mailchimp stehen Ihnen zahlreiche großartige Integrationen zur Verfügung. Stellen Sie also sicher, dass Sie Ihr Toolkit verbinden, um noch mehr aus dem Produkt herauszuholen! 🛠
Sie können zum Beispiel Listen mit Ihrer WordPress-Website verbinden, um mehr Anmeldungen zu erhalten, oder sogar eine Veranstaltung auf Eventbrite verbinden, um die Teilnehmer automatisch zu einer Mailingliste hinzuzufügen. Darüber hinaus hilft Ihnen die Mailchimp to Looker Studio-Integration, die Ergebnisse Ihrer E-Mail-Kampagnen zu visualisieren und umfassende Berichte für Manager und Stakeholder zu erstellen.
Und da sie über eine API verfügen, auf der sie aufbauen können, gibt es praktisch unbegrenzte Möglichkeiten.
Unser persönlicher Favorit ist natürlich die Integration von Salesflare mit Mailchimp über Zapier.

Sie können neue Salesflare-Kontakte zu einer MailChimp-Liste hinzufügen oder sogar Salesflare-Kontakte, Konten und Verkaufschancen aus neuen MailChimp-Abonnenten erstellen. 😄
Sie können das Integrationsverzeichnis von Mailchimp hier aufrufen.
8. Nutzen Sie MailChimp-Berichte, um mehr über die Leistung Ihrer Kampagne zu erfahren
Mit der Berichtsfunktion von Mailchimp können Sie sehen, wie Ihr Publikum mit Ihren Inhalten umgeht.
Gehen Sie einfach zu Berichte und wählen Sie die Kampagne aus, für die Sie einen Bericht sehen möchten. Von dort aus können Sie alles im Detail sehen und sich ein besseres Bild davon machen, wie gut eine bestimmte Kampagne funktioniert hat.
Es gibt eine ganze Reihe von Metriken, die Sie betrachten können:
- Empfänger: Anzahl der Abonnenten, an die die Kampagne gesendet wurde
- Geliefert: Datum und Uhrzeit, zu der die Kampagne von den Mailchimp-Servern gesendet wurde
- Öffnungsrate: Prozentualer Anteil der erfolgreich ausgelieferten Kampagnen, die als offen registriert wurden
- Klickrate: Prozentsatz der erfolgreich ausgelieferten Kampagnen, die einen Klick registriert haben
- Listendurchschnitt für Öffnungen und Klicks: Durchschnittlicher Prozentsatz der Öffnungen oder Klicks bei früheren Kampagnen, die an diese Liste gesendet wurden
- Branchendurchschnitt bei Öffnungen und Klicks: Durchschnittlicher Prozentsatz der Öffnungen oder Klicks für Kampagnen in der ausgewählten Branche, die für Ihr Konto festgelegt wurde
- Geöffnet: Anzahl der Empfänger, die diese Kampagne beliebig oft geöffnet haben
- Geklickt: Anzahl der Empfänger, die auf einen beliebigen verfolgte Verbindung beliebig viele Male in dieser Kampagne
- Aufgeprallt: Anzahl der Empfänger, die sich als harter oder weicher Aufprall
- Abbestellt: Anzahl der Abonnenten, die sich über den Abmeldelink in dieser Kampagne von Ihrer Liste abgemeldet haben
- Öffnungen insgesamt: Gesamtzahl der Öffnungen der Kampagne durch die Empfänger; diese Zahl umfasst mehrere Öffnungen durch einzelne Empfänger
- Erfolgreiche Lieferungen: Die Anzahl der Empfänger, die bei dieser Kampagne keinen Hard- oder Softbounce gemacht haben
- Klicks pro einmaligem Öffnen: Prozentsatz der Empfänger, die sich als offen registriert haben und auch auf einen Link in Ihrer Kampagne geklickt haben
- Klicks insgesamt: Gesamtzahl der Klicks von Empfängern auf verfolgte Links; diese Zahl umfasst Mehrfachklicks von einzelnen Empfängern
- Weitergeleitet: Anzahl der Weiterleitungen der Kampagne über das Formular "An einen Freund weiterleiten"; diese Statistik berücksichtigt nur Weiterleitungen über das Formular "An einen Freund weiterleiten" und ist nicht in der Lage zu erkennen, wenn ein Abonnent die Weiterleitungsfunktion in seinem E-Mail-Programm nutzt
- Vorwärts öffnet: Anzahl der Öffnungen der Kampagne durch eine Person, die die Kampagne über ein Weiterleitungsformular an einen Freund weitergeleitet hat
- Missbrauchsberichte: Anzahl der Empfänger, die Ihre E-Mail als Spam gemeldet haben; Abonnenten, die eine Kampagne als Spam melden, werden automatisch von Ihrer Liste abgemeldet
- Zuletzt geöffnet: Der letzte Fall, in dem ein Empfänger die Kampagne geöffnet hat
- Zuletzt angeklickt: Der letzte Klick eines Empfängers auf einen verfolgten Link in der Kampagne
- 24-Stunden-Leistung: Ein Diagramm, das die Aktivität der Abonnenten (Öffnungen und Klicks) in den ersten 24 Stunden nach dem Versand der Kampagne anzeigt
- Meistgeklickte Links: Die URLs, die in der Kampagne am häufigsten angeklickt wurden.
- Abonnenten mit den meisten Öffnungen: Abonnenten, die die Kampagne am häufigsten geöffnet haben
- Soziale Leistung: Bietet eine Vogelperspektive auf den Erfolg Ihrer Kampagne in den verschiedenen sozialen Medien
- Top-Standorte: Zeigt an, wo in der Welt Ihre Abonnenten Ihre Kampagnen öffnen
Es gibt hier viele Kennzahlen, also nehmen Sie sich etwas Zeit, um sie alle durchzusehen und eine bessere Vorstellung davon zu bekommen, welche Kennzahlen Sie im Laufe der Zeit verbessern möchten. 📈
A/B-Tests eignen sich, wie in Schritt sechs erwähnt, hervorragend, um verschiedene Variablen zu testen und die beste Formel für erfolgreiche E-Mail-Kampagnen zu ermitteln - die Statistiken für alle A/B-Tests sind auch in Kampagnenberichten enthalten.
Da haben Sie es! Verwenden Sie diesen Leitfaden, um mit Mailchimp zu beginnen und ansprechende E-Mails an Ihre Kunden und Interessenten zu senden. 👏
Dieser Leitfaden deckt zwar den Großteil der Funktionen von Mailchimp ab, aber es gibt noch viele andere Dinge zu entdecken und auszuprobieren.
Glücklicherweise bieten sie eine großartige Wissensdatenbank, die alle Ihre brennenden Fragen zu einer Vielzahl von Funktionen und Themen beantwortet - worauf warten Sie also noch?
Viel Spaß beim Mailen! 💌
Noch einmal: Wenn Sie auf der Suche nach einem schlanken Vertriebs-CRM im Mailchimp-Stil sind, das Sie ganz einfach mit Mailchimp verknüpfen können: Schauen Sie sich Salesflare doch einmal an! Wir kümmern uns gerne um Sie.

Wir hoffen, dass Ihnen dieser Beitrag gefallen hat. Wenn ja, empfehlen Sie ihn weiter!
👉 Sie können @salesflare folgen auf Twitter, Facebook und LinkedIn.
Zuletzt aktualisiert:
- 22+ Beste Vertriebs-Podcasts, die Sie sich 2026 ansehen sollten - 8. August 2024
- Cold-Calling-Skripte für echte Menschen - 21. September 2023
- Die 25+ besten Verkaufstools, die Ihr Team erfolgreich machen - 10. August 2023