La guida definitiva a Mailchimp
Ecco come utilizzare Mailchimp
Ah sì, MailKimp.
O è KaleLimp?
...MailShrimp? 🤔

Indipendentemente dal nome, Mailchimp, la piattaforma di marketing automation ed email marketing con sede ad Atlanta, è stata fondata nel 2001 e ha visto una crescita incredibile nel corso degli anni. 🚀
Sebbene l'azienda sia nota per le sue campagne pubblicitarie intelligenti e stravaganti, è anche un ottimo strumento per chiunque voglia implementare l'email marketing nella propria attività.
È uno strumento facile da usare una volta che ci si è abituati e il suo prezzo è ideale per un'ampia varietà di budget.
Ma se non sapete da dove cominciare, non preoccupatevi! Abbiamo messo insieme questo tutorial con istruzioni passo-passo su come iniziare con Mailchimp. 🤘
Oh, e se state cercando un CRM di vendita leggero in stile Mailchimp che si possa facilmente collegare a Mailchimp: controllate Salesflare!
1. Imparare a utilizzare le diverse sezioni di Mailchimp
Prima di tutto, dobbiamo capire i diversi strumenti disponibili nella dashboard di Mailchimp!
Come si può vedere, una volta configurato l'account e effettuato l'accesso, si accede alla dashboard.
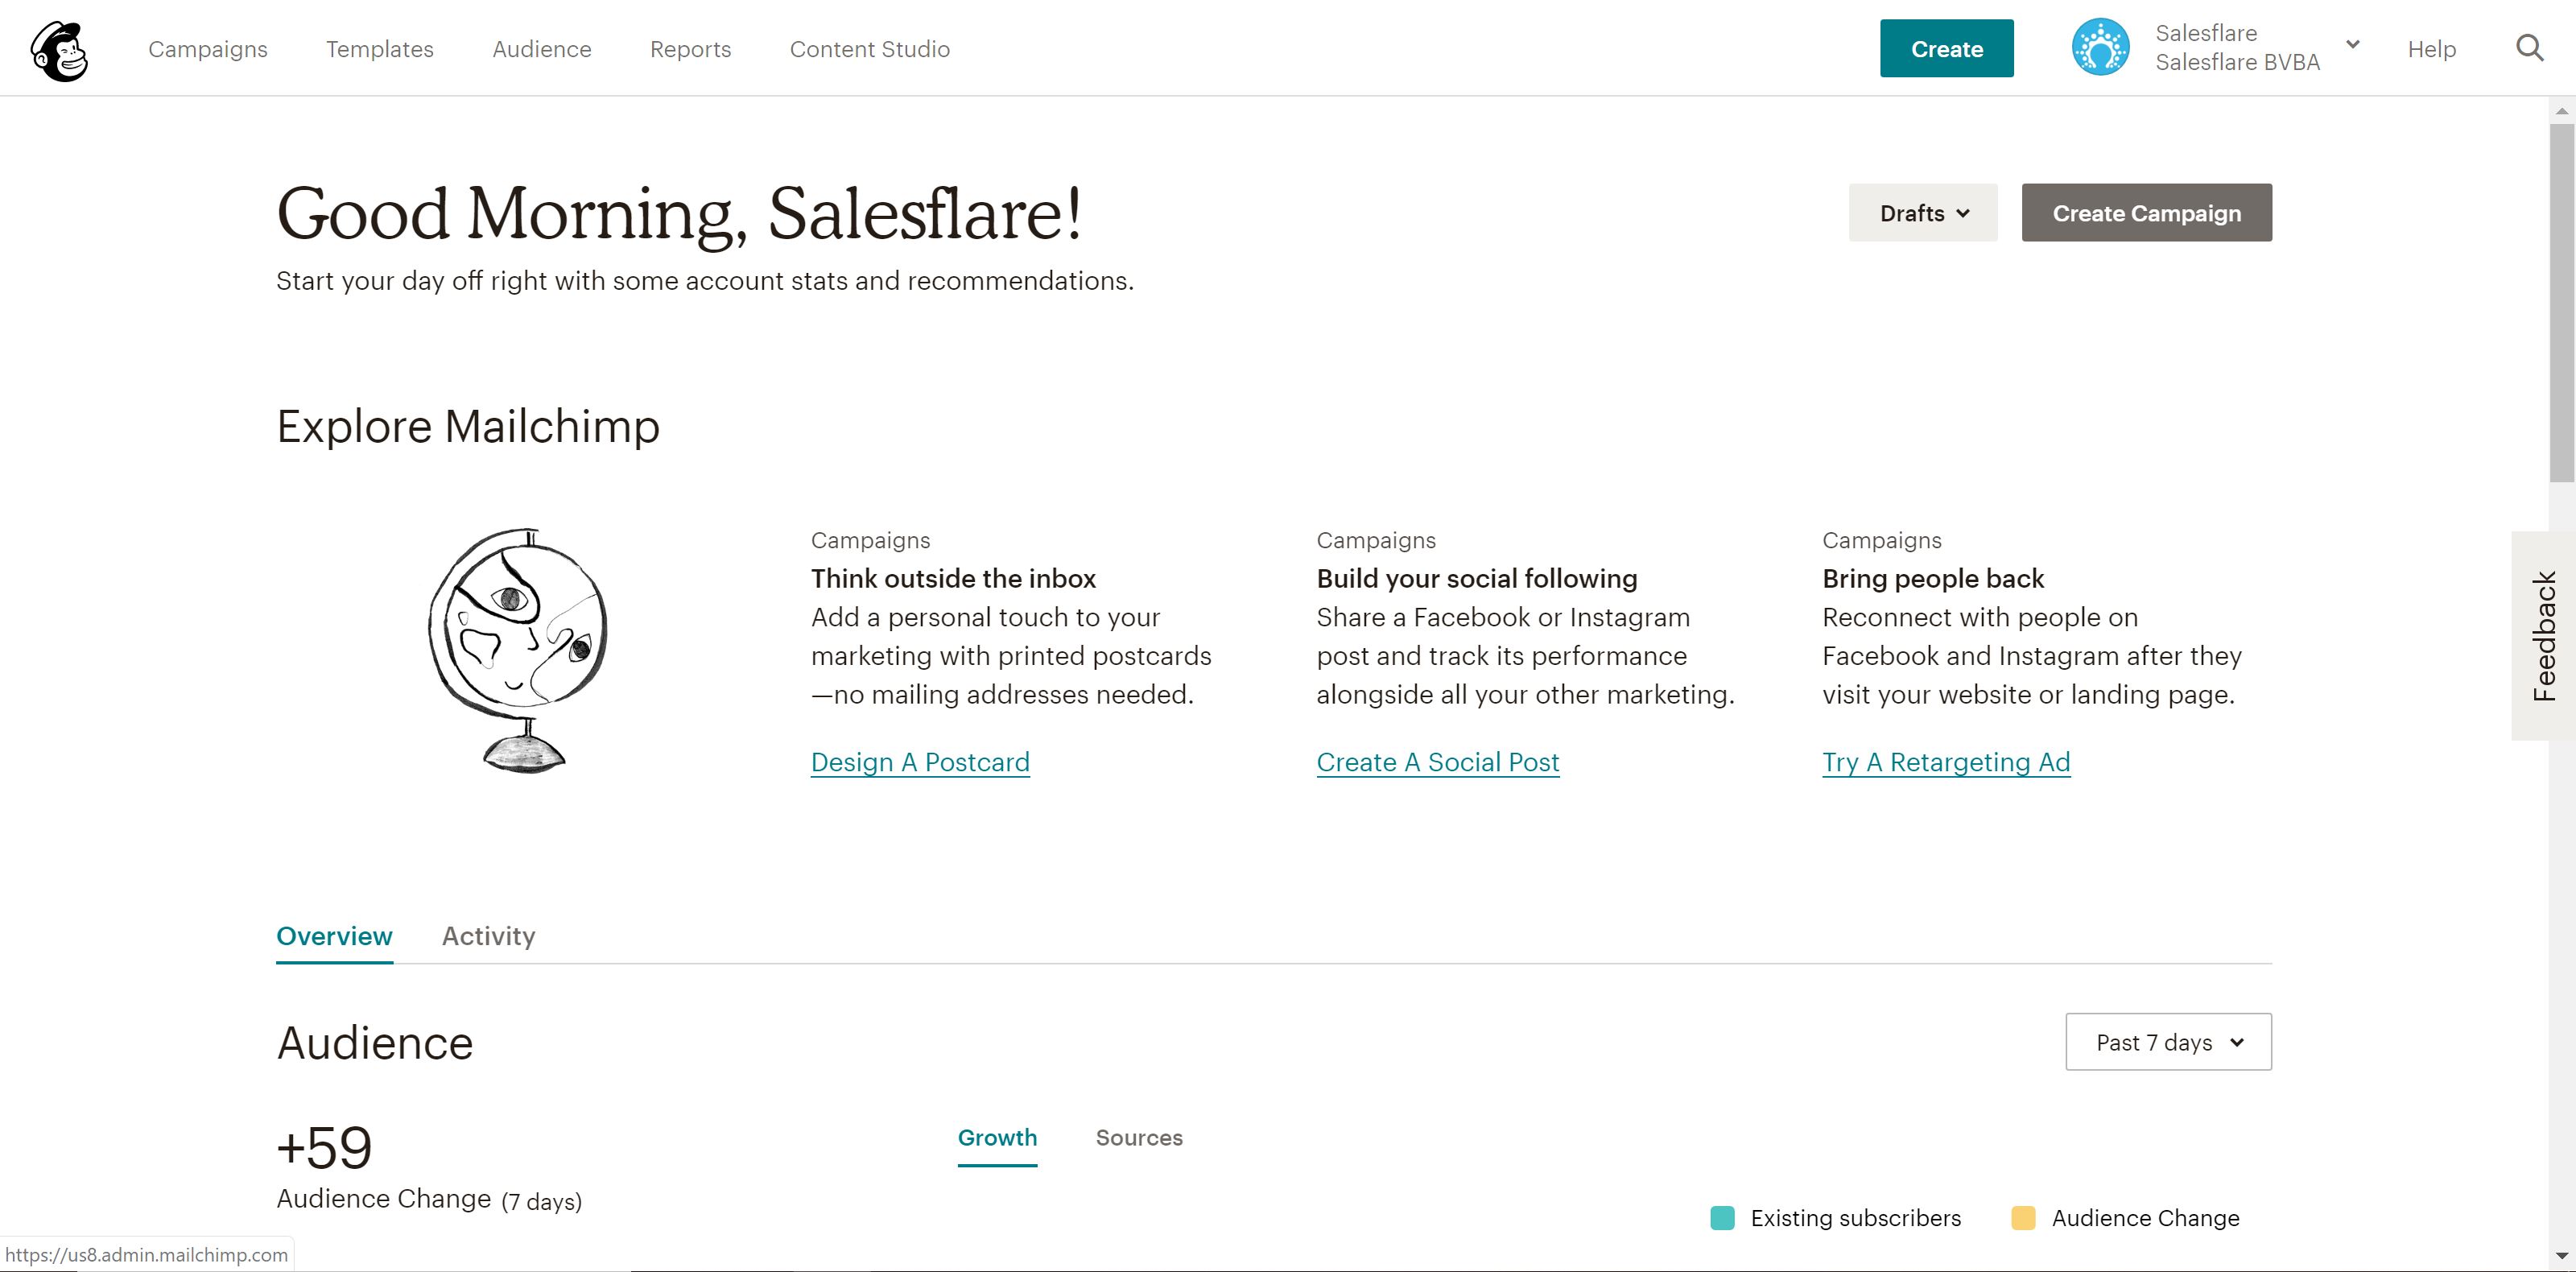
Noterete che ci sono cinque schede diverse in alto a sinistra dello schermo: Campagne, Modelli, Elenchi, Rapporti e Studio dei contenuti.
Campagne sono le vere e proprie e-mail, landing page, ecc. che pubblicate e inviate ai clienti, come parte del vostro marketing via e-mail. Ne parleremo in dettaglio nel quarto passo.
Modelli è la sezione in cui è possibile creare il design e contenuti per le vostre campagne - per saperne di più si veda la terza fase.
Pubblico (ex Liste) è la sezione per la gestione del pubblico/liste di posta elettronica. Ne parleremo nella seconda fase.
Rapporti - è una sezione che si spiega da sola, in cui si possono esaminare le performance delle campagne. In pratica, potete vedere chi si sta impegnando con cosa e utilizzare queste informazioni per ottimizzare le vostre campagne. Approfondiremo il tema della reportistica nella fase 8.
Studio di contenuti è una sezione piuttosto nuova dall'inizio del 2019 che offre una visione migliore delle risorse creative, come le immagini e le gif caricate, loghiecc. È semplicissimo, quindi non ci dilungheremo oltre.
Nel corso di questo post esploreremo le prime quattro sezioni, oltre ad altre potenti funzioni avanzate.
Quindi iniziamo! 👊
2. Costruire le liste e impostare il modulo di iscrizione
Dopo l'iscrizione, Mailchimp vi guiderà nella configurazione del vostro account, come il vostro sito web, la connessione degli account dei social media, ecc.
Potete anche collegare il vostro negozio online a Mailchimp, se lavorate in e-commerce. 🛍
Ma dopo tutte le questioni amministrative, è il momento di rimboccarsi le maniche e mettersi al lavoro!
La prima cosa, e probabilmente la più importante, da fare quando si configura Mailchimp è costruire le proprie mailing list - liste pulite e aggiornate di clienti, lead e contatti commerciali con cui si vuole comunicare.
Dopotutto, coinvolgere i vostri clienti (e potenziali clienti) è lo scopo di avere Mailchimp in primo luogo, giusto? 😉
Si può iniziare con una sola lista, ma si è liberi di creare tutte le liste che si ritengono opportune. Da notare, però, che se si ha lo stesso contatto in più liste, questo conterà separatamente ai fini del limite complessivo di iscritti, poiché le liste non sono collegate.
È possibile, naturalmente, segmentare e etichettare le liste - per saperne di più qui.
La struttura dei prezzi di Mailchimp funziona così, quindi non esagerate nell'aggiungere lo stesso contatto a più liste. Può diventare molto disordinato molto rapidamente!
Non avete ancora contatti? Mailchimp vi copre. 👍
Genera automaticamente un modulo di iscrizione per ogni lista creata, che potrete poi utilizzare per ottenere più iscritti. Condividetelo su il vostro sito web, sui canali dei social media, ovunque vogliate.
È anche possibile personalizzare questi moduli utilizzando il Form Builder.
Ecco come:
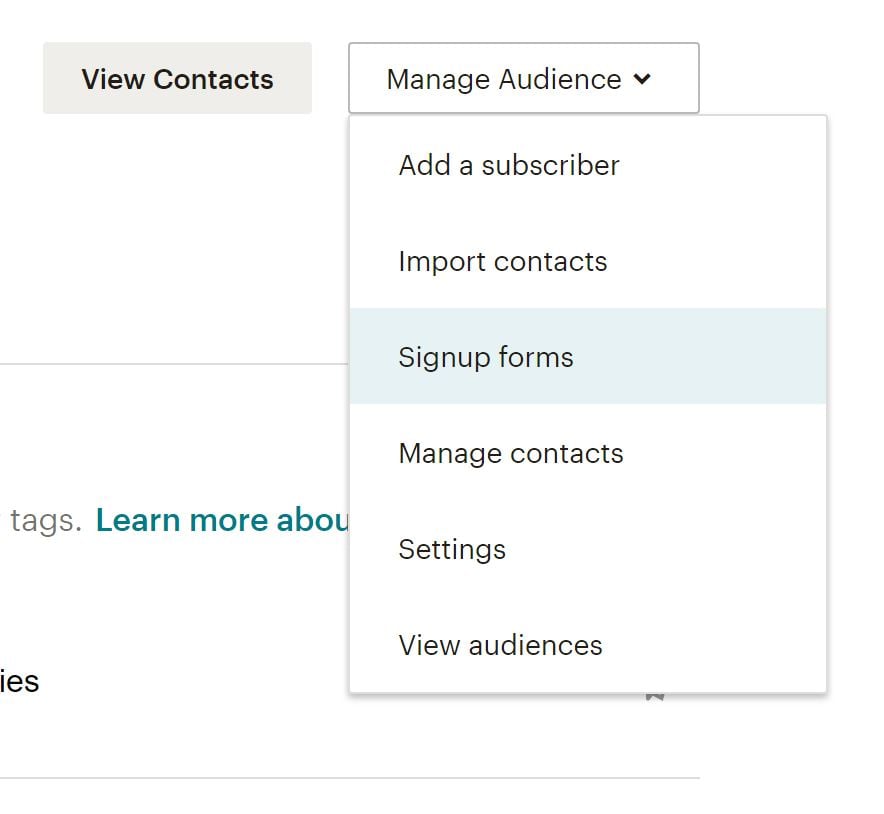
1. Andare alla pagina del pubblico
2. Selezionare l'audience giusta in alto a sinistra, quindi premere Gestione audience in alto a destra e scegliere Moduli di iscrizione.
 3. Selezionare il costruttore di moduli

4. Fare clic sul menu a discesa Moduli e e-mail di risposta e scegliere il modulo da modificare.
5. Fare clic sulla scheda Design it in basso
6. Fare clic sulle schede Pagina, Corpo, Moduli o MonkeyRewards per esaminare le opzioni di personalizzazione; utilizzare i campi e i menu a discesa per apportare le modifiche desiderate agli stili, ai colori e ai campi - Mailchimp salva automaticamente le modifiche.
Quando si è soddisfatti del design, fare clic su Salva e chiudi. Tutto fatto!
Copiate il codice del vostro modulo e condividetelo su tutti i vostri canali online. 🎉
Newsletter via e-mail o e-mail personali in scala?
Prima di iniziare a imparare come creare modelli di e-mail e inviare campagne e-mail, vorrei verificare rapidamente se siete nel posto giusto.
Siete alla ricerca di:
- Inviate una email newsletter.
- O inviare e-mail personali in scala?
Se sei qui per l'opzione 1, continua a leggere! Mailchimp è ottimo, oppure ci sono altre opzioni di newsletter software per voi. Anche noi utilizziamo Mailchimp per la nostra newsletter. (Se siete interessati, potete iscrivervi alla nostra newsletter sulla homepage del blog). Continuate e passate alla prossima sezione!
Se siete qui per l'opzione 2, potreste voler considerare un'altra opzione.
Il vantaggio di utilizzare Mailchimp a questo scopo è che potete inviare e-mail a migliaia di persone in una volta sola, in modo rapido.
Gli aspetti negativi dell'utilizzo di Mailchimp sono i seguenti:
- La vostra e-mail non sembrerà davvero personale. L'occhio allenato (e oggi le persone sono allenate a riconoscere le e-mail di massa) vedrà sempre che si tratta di un'e-mail di massa.
- Non finirà nella casella di posta prioritaria del vostro pubblico. Le caselle di posta elettronica come Gmail e Outlook oggi smistano le e-mail inviate con un provider di servizi e-mail in una scheda chiamata "Promozioni" o "Altro".
- Ciò si traduce anche in tassi di apertura più bassi (e quindi anche in un minor numero di clic e risposte).
- E poiché Mailchimp deve affrontare un certo numero di abusi (da parte di un piccolo ma considerevole gruppo di persone), questo può anche far sì che le vostre e-mail abbiano maggiori probabilità di essere catturate in una cartella spam.
Qual è quindi l'alternativa che non presenta tutti questi svantaggi? Potete inviare queste e-mail direttamente dalla vostra casella di posta elettronica, in modo personale e su larga scala. Sì, esiste un software per newsletter anche per questo!
Date un'occhiata alla nostra guida su come inviare email di massa su scala che sembrino personali. Vi spiegheremo come procedere passo dopo passo!
3. Creare il primo modello di e-mail
Quando si parla di email marketing, si sente parlare molto di design, modelli, campagne, ecc. Ma qual è la differenza tra modelli e campagne?
Come accennato in precedenza, la funzione modelli di Mailchimp è essenzialmente quella che consente di progettare layout riutilizzabili per i contenuti, mentre le campagne servono per inviare i messaggi veri e propri.
Fortunatamente Mailchimp consente di riutilizzare facilmente i progetti delle campagne o di replicare le campagne esistenti, ma quando si utilizza lo strumento, di solito è meglio inserire i contenuti riutilizzabili nei modelli e i contenuti specifici dei messaggi nelle campagne.
Ora parliamo di come utilizzare i template! 💪
Come vedrete, Mailchimp mette a disposizione un gran numero di modelli preimpostati. Sentitevi liberi di usarle mentre imparate a costruire modelli ben progettati.
Tuttavia, potete anche partire da zero e creare un modello personalizzato che si adatti al vostro marchio e al vostro stile.
Mailchimp salva anche le immagini caricate sul vostro account, in modo da poterle riutilizzare in modelli futuri.
Il processo di creazione di un bellissimo modello di email è relativamente semplice, poiché Mailchimp ti offre la possibilità di trascinare e rilasciare blocchi di contenuto nella tua newsletter.

Come potete vedere, sono disponibili moltissime opzioni. Dai video esplicativi alle immagini ai pulsanti call-to-action, è facile creare un'e-mail con contenuti dinamici e interessanti.
Mailchimp salva il vostro lavoro man mano che procedete e, quando avete finito, potete salvare e uscire dall'editor.
Suggerimento: Non dimenticate di aggiungere i merge tag! I dati che avete aggiunto a Mailchimp, come ad esempio loghi e l'indirizzo della vostra azienda vengono salvati sotto i tag di unione e vi aiutano ad aggiungere il marchio senza dover reinserire le informazioni ogni volta. Ecco un fantastico foglio informativo sui tag merge di Mailchimp per aiutarvi a iniziare.
Una volta progettata l'email o la landing page perfetta, è il momento di inviarla al vostro pubblico!
4. Creare la prima campagna in Mailchimp
Le campagne sono il luogo in cui invierete il vostro messaggio al pubblico, sia che si tratti di un annuncio, di una landing page o di un'e-mail.
Un esempio: supponiamo di voler creare una newsletter e inviarla al proprio pubblico. Una volta sviluppata la newsletter in un modello, è il momento di creare la prima campagna.
Per creare una campagna e-mail:
1. Andare su Campagne e fare clic su Crea campagna.
2. Selezionare E-mail, inserire il nome della campagna e fare clic su Inizia.
3. Nella sezione A, fate clic su Aggiungi destinatari e selezionate l'elenco a cui volete inviare l'e-mail; potete anche selezionare segmenti o tag specifici all'interno dell'elenco, se avete segmentato il vostro pubblico in un determinato modo.
4. Fare clic su Salva e passare alla sezione Da; inserire il nome e l'indirizzo e-mail da cui si desidera ricevere il messaggio e fare clic su Salva.
5. Quindi, nella sezione Oggetto, fate clic su Aggiungi oggetto e inserite l'oggetto e il testo di anteprima dell'e-mail: scrivete qualcosa che faccia risaltare la vostra e-mail! Fate clic su Salva e passate alla sezione successiva
6. Nella sezione Contenuto, fate clic su Progetta email e selezionate il modello che desiderate utilizzare per la vostra email; Mailchimp vi mostrerà nuovamente la pagina dell'editor in modo che possiate ricontrollare il contenuto e apportare eventuali modifiche dell'ultimo minuto al design*.
* Se si preferisce, è possibile utilizzare questa fase per aggiungere contenuti e progettare l'e-mail, piuttosto che utilizzare la funzione Modello per aggiungere contenuti in precedenza.
7. Una volta che il contenuto è pronto, avete la possibilità di collegare i vostri account Facebook e Twitter al messaggio, in modo che Mailchimp possa condividere automaticamente la campagna con i vostri follower.
8. Infine, in fondo alla pagina è presente un elenco puntato che riassume le cose che sono o non sono incluse nell'e-mail; assicuratevi di rivederlo per essere sicuri di tracciare tutto ciò che volete tracciare con l'e-mail.
9. Fare clic su Invia e confermare oppure, se si desidera inviare l'e-mail in un momento successivo, fare clic su Pianifica e selezionare l'ora in cui si desidera che l'e-mail venga inviata.
Congratulazioni! Avete appena inviato la vostra prima campagna e-mail su Mailchimp!

Con le diverse funzioni di Mailchimp, scoprirete rapidamente che ci sono molte cose divertenti da fare con i vostri contenuti, quindi prendetevi un po' di tempo per giocare con lo strumento e prendere confidenza con tutto ciò che è a vostra disposizione.
Le prossime fasi esplorano alcune di queste pratiche funzioni, quindi procediamo.
5. Utilizzare l'automazione e risparmiare tempo
Qui a Salesflare siamo grandi fan dell'automazione, quindi vale certamente la pena di sottolineare le funzioni di automazione delle email disponibili per gli utenti di Mailchimp! 🤓
Dall'invio di e-mail di onboarding ai nuovi clienti alla creazione di un flusso di lavoro per accogliere i nuovi iscritti, ci sono molti modi per far risparmiare tempo a voi e al vostro team con l'invio di e-mail.
Come si accede a questa funzione? Supponiamo che vogliate dare il benvenuto ai nuovi iscritti alla vostra mailing list:
1. Andare alle Campagne
2. Creare una nuova campagna e selezionare Email automatiche
3. Da qui, vedrete che sono disponibili molti flussi di lavoro automatizzati; per ora, selezionate Benvenuto ai nuovi iscritti.
4. Assegnare un nome alla campagna e selezionare l'elenco che si desidera utilizzare per l'automazione.
5. Da qui è possibile progettare l'e-mail e modificare tutte le impostazioni per adattarle alle proprie preferenze; è anche possibile aggiungere altre e-mail a un flusso di lavoro, se si desidera inviare anche e-mail di onboarding, ad esempio. (per arrivare qui, fate clic su "Usa impostazioni avanzate" in alto a sinistra)

6. Una volta configurato tutto, fare clic su Avanti e controllare due volte tutte le impostazioni prima di fare clic su Pubblica.
Boom! Ora state inviando e-mail automatiche ai vostri nuovi iscritti senza muovere un dito. 💆♀️
6. Sperimentare i test A/B
Siete in conflitto con l'oggetto da utilizzare per la vostra e-mail? Forse volete testare una copia diversa sui pulsanti di invito all'azione?
Mailchimp sa bene che le aziende vogliono dare il meglio di sé (leggi: email), per cui è possibile utilizzare i test A/B per far sì che ciò accada!
Le campagne di A/B testing sono costruite in una serie di fasi, proprio come gli altri tipi di campagne.
Nota: Mailchimp consiglia di testare combinazioni di almeno 5.000 destinatari per ottenere i dati più utili dai risultati. Se non avete ancora così tanti iscritti, non preoccupatevi. Potete comunque impostare un test, ma sappiate che i dati potrebbero non essere così precisi.
Per creare una nuova campagna di test A/B, procedere come segue:
1. Andare alle Campagne
2. Fate clic su Invia, come se steste creando una normale campagna e-mail.
3. Selezionare il test A/B
4. Assegnate un nome alla vostra campagna e selezionate l'elenco di e-mail che desiderate inviare.
5. Fare clic su Inizia
6. Scegliere l'elenco o il segmento a cui inviare la campagna.
7. Quindi, iniziamo a selezionare le variabili da testare; scegliamo tra Oggetto, Nome destinatario, Contenuto e Ora di invio.

8. Fare clic sulle icone Più o Meno per aggiungere o rimuovere variazioni della variabile; è possibile testare una variabile con un massimo di tre variazioni.
9. Ogni variante genererà una combinazione di campagne, come mostrato nel riepilogo; ad esempio, per testare tre righe di oggetto, dovrete creare tre combinazioni della vostra campagna

10. In Come suddividere i destinatari?, fate clic e trascinate il cursore per impostare la percentuale di destinatari a cui volete inviare le combinazioni di test; controllate il numero di destinatari che riceveranno ciascuna combinazione nel riepilogo.

Nota: Se state testando il tempo di invio, sarete in grado di inviare solo al 100% dei destinatari del vostro elenco.
11. Scegliere se determinare il vincitore in base al tasso di apertura, al tasso di clic, al ricavo totale o manualmente; quindi, scegliere la durata del test.

12. Al termine della fase di test, Mailchimp invierà la combinazione vincente ai destinatari rimanenti.
13. Inserire il contenuto della variazione nell'apposito campo; in questa fase vengono visualizzate anche le impostazioni delle variazioni di orario di invio.

14. Selezionate le caselle accanto alle impostazioni o alle opzioni di tracciamento che preferite, per includere
15. Test dell'oggetto, del nome del destinatario o dell'orario di invio
- 15a. Scegliere il layout nella fase Modello del Generatore di contenuti.
- 15b.Nella fase di progettazione del Generatore di contenuti, progettare e testare la campagna.
- 15c. Quando tutto è come desiderato, fare clic su Conferma prima di inviare.
16. Contenuto del test
- 16a. Fare clic su Aggiungi contenuto per una variante della campagna
- 16b. Scegliere il layout nella fase Modello del Generatore di contenuti.
- 16c. Nella fase Progettazione del Generatore di contenuti, progettare e testare la campagna; quando tutto è come si desidera, fare clic su Avanti.
- 16d. Nella fase Descrizione del Generatore di contenuti, digitate un testo per descrivere la variante del contenuto; gli abbonati non vedranno questa descrizione, ma vi aiuterà a ricordare le differenze tra ogni variante.
- 16e. Fare clic su Continua al contenuto per tornare alle variazioni del contenuto.
- 16f. Ripetete i passaggi 16a-16e per ogni variante di contenuto; nel passaggio Modello, utilizzate un modello diverso o selezionate una variante già progettata nella scheda Varianti precedenti.
- 16g. Quando tutto è come desiderato, fare clic su Avanti
17. Confermate tutte le informazioni della vostra campagna e poi programmatela o inviatela.
Gli utenti dell'account con livello utente Manager o superiore riceveranno un'e-mail quando il vincitore sarà stato scelto automaticamente, oppure dopo quattro ore se non è stato ancora scelto manualmente.
7. Sfruttare tutto il potenziale di Mailchimp con le integrazioni
Con Mailchimp sono disponibili numerose integrazioni, quindi assicuratevi di collegare il vostro kit di strumenti per ottenere ancora di più dal prodotto! 🛠
Ad esempio, è possibile collegare le liste al proprio sito WordPress per ottenere un maggior numero di iscrizioni o anche collegare un evento su Eventbrite per aggiungere automaticamente i partecipanti a una mailing list. Inoltre, l'integrazione Mailchimp to Looker Studio vi aiuterà a visualizzare i risultati delle vostre campagne e-mail e a creare report completi per i manager e le parti interessate.
E poiché dispongono di un'API su cui basarsi, le possibilità sono virtualmente illimitate.
La nostra preferita, naturalmente, è l'integrazione Salesflare ha con Mailchimp attraverso Zapier.

È possibile aggiungere nuovi contatti Salesflare a un elenco MailChimp o anche creare contatti, account e opportunità Salesflare da nuovi iscritti a MailChimp. 😄
È possibile accedere all'elenco delle integrazioni di Mailchimp qui.
8. Utilizzate i report di MailChimp per saperne di più sulle prestazioni della vostra campagna.
La funzione Rapporti di Mailchimp vi permette di vedere come il vostro pubblico si sta impegnando con i vostri contenuti.
Basta andare su Rapporti e selezionare la campagna per la quale si desidera visualizzare un rapporto. Da qui, potrete vedere tutto in modo più dettagliato e farvi un'idea più precisa dell'andamento di una determinata campagna.
Sono diverse le metriche che si possono esaminare, ecco una ripartizione:
- Destinatari: Numero di abbonati a cui è stata inviata la campagna
- Consegnato: Data e ora in cui la campagna ha completato l'invio dai server di Mailchimp
- Tasso di apertura: Percentuale di campagne consegnate con successo che sono state registrate come aperte
- Tasso di clic: Percentuale di campagne consegnate con successo che hanno registrato un clic
- Media della lista per aperture e clic: Percentuale media di aperture o di clic sulle campagne precedenti inviate a questa lista.
- Media del settore per aperture e clic: Percentuale media di aperture o di clic per le campagne nel settore selezionato per l'account.
- Aperto: Numero di destinatari che hanno aperto questa campagna un numero qualsiasi di volte.
- Cliccato: Numero di destinatari che hanno cliccato su un qualsiasi link tracciato un numero qualsiasi di volte in questa campagna
- Rimbalzato: Numero di destinatari che si sono registrati come rimbalzo duro o morbido
- Non sottoscritto: Numero di iscritti che si sono cancellati dalla vostra lista utilizzando il link di annullamento dell'iscrizione in questa campagna.
- Totale aperture: Numero totale di volte in cui la campagna è stata aperta dai destinatari; questo conteggio include aperture multiple da parte di singoli destinatari.
- Consegne di successo: Il numero di destinatari che non hanno effettuato hard o soft bounce su questa campagna.
- Clic per aperture uniche: Percentuale di destinatari che si sono registrati come aperti e che hanno anche cliccato su un link nella vostra campagna.
- Totale clic: Numero totale di volte in cui i link tracciati sono stati cliccati dai destinatari; questo conteggio include i clic multipli da parte di singoli destinatari.
- Inoltrato: Numero di volte che la campagna è stata inoltrata utilizzando il modulo Inoltra a un amico; questa statistica considera gli inoltri solo attraverso il modulo Inoltra a un amico e non è in grado di rilevare quando un abbonato utilizza la funzione di inoltro nel proprio programma di posta elettronica.
- Apertura in avanti: Numero di volte in cui la campagna è stata aperta da qualcuno a cui è stata inoltrata tramite il modulo Inoltra a un amico.
- Segnalazioni di abusi: Numero di destinatari che hanno segnalato la vostra email come spam; gli iscritti che segnalano una campagna come spam vengono automaticamente cancellati dalla vostra lista.
- Ultima apertura: Il caso più recente di apertura della campagna da parte di un destinatario.
- Ultimo clic: Il caso più recente in cui un destinatario ha fatto clic su un link tracciato nella campagna.
- Prestazioni 24 ore su 24: Un grafico che illustra l'attività degli abbonati (aperture e clic) nelle prime 24 ore dopo l'invio della campagna.
- I link più cliccati: Gli URL che sono stati cliccati di più nella campagna.
- Abbonati con il maggior numero di aperture: Abbonati che hanno aperto la campagna il maggior numero di volte
- Prestazioni sociali: Fornisce una visione d'insieme dell'andamento della campagna sui diversi social media.
- Località principali: Mostra in quale parte del mondo i tuoi abbonati aprono le tue campagne.
Ci sono molte metriche, quindi prendetevi un po' di tempo per esaminarle tutte e farvi un'idea più precisa di quali metriche vorreste migliorare nel tempo. 📈
I test A/B, come menzionato nel punto sei, sono perfetti per testare diverse variabili e determinare la formula migliore per campagne e-mail di successo - le statistiche di tutti i test A/B sono anche incluse nei rapporti sulle campagne.
Ecco fatto! Utilizzate questa guida per iniziare a utilizzare Mailchimp e inviare e-mail coinvolgenti ai vostri clienti e contatti. 👏
Sebbene questa guida copra la maggior parte delle funzionalità di Mailchimp, ci sono molte altre cose da esplorare e provare personalmente.
Fortunatamente, offrono un'ottima base di conoscenza progettata per rispondere a tutte le vostre domande più scottanti su un'ampia varietà di funzioni e argomenti - quindi cosa state aspettando?
Buon lavoro con le email! 💌
Ancora una volta, se stai cercando un CRM di vendita leggero, in stile Mailchimp, che puoi collegare facilmente a Mailchimp: date un'occhiata a Salesflare! Ci prenderemo cura di voi.

Speriamo che questo post vi sia piaciuto. Se vi è piaciuto, spargete la voce!
👉 Potete seguire @salesflare su Twitter, Facebook e LinkedIn.
Ultimo aggiornamento:
- 22+ Best Sales Podcasts You Should Check Out in 2026 - Agosto 8, 2024
- Scritture di chiamata a freddo per esseri umani reali - 21 settembre 2023
- Gli oltre 25 migliori strumenti di vendita per aiutare il vostro team ad avere successo - 10 Agosto 2023